Sailing & Bartering
Zeitpunkt der letzten Änderungen : 04. Jun 2026, 09:04 (UTC)
Sailing on the open seas is a magical experience that offers a mix of peace, adventure, and discovery. The vast ocean provides a chance to enjoy nature's maritime beauty, as well as meet the people that call the islands scattered around their home.
The feeling of accomplishment from successfully navigating the sea and mastering new skills, such as sea monster hunting and bartering, can be said to be equivalent to discovering a new territory, or defeating a powerful boss you had never seen before. Whether you're a seasoned sailor or a beginner, the wonders of sailing on the open seas await your discovery.
Sailing
You may have seen ships anchored and traveling around the different port towns, such as in Velia or Port Epheria, during your journey. If you have ever wondered what the ocean content of Black Desert's world offers, you too will need to delve into the art of sailing, and for that you will require a sea-worthy ship.
While you can obtain rafts, rowboats, fishing boats, and cogs quite easily, it is recommended that you obtain at the very least a Bartali sailboat, or better an Epheria sailboat or frigate, when you start your journey at sea. A Bartali sailboat can be purchased from Proix, in Velia. An Epheria sailboat or frigate can be crafted, upgraded into, or purchased from the Central Market. You can also obtain them by exchanging Shakatu seals.
When you obtain a sailboat or frigate you will see that they are quite slow and offer little in the way of inventory slots and weight capacity, not to mention the visual difference between them and the majestic ships you might notice anchored at the different towns' wharfs. Black Desert offers a ship upgrading path you can follow to ultimately obtain those same marvelous ships.
➤ You can read more about this topic in the [Ship Upgrading] page. Please note that many of the basics of features mentioned there are explained here in the Sailing & Bartering page.
◈ Ocean Wind
Ocean wind affects sailing in all parts of the world of Black Desert.
It will not affect your ship as much when near the coastline, but will become a lot stronger as you venture further from the coast and out into the sea.
When you board your ship, you will be provided with information on the strength and direction of the wind in the area you are in. It updates automatically as you travel.

The top bar indicates the speed of the ship. Below you are given the option to toggle the continuous use of the skill Breezy Sail (from sailing level skilled 1 onward). Please be careful when enabling this option, as it consumes rations like when you manually use it.
Below that, you can find the durability (in red) and rations (in yellow) bars. The ship's durability is its health. If it reaches zero, the ship is destroyed. The ship's rations are consumed when moving, when using skills, and when doing certain activities. When they reach zero all skills that require them will not be usable, and the ship will move at a considerably slower speed than normal.
To the right, you will see the wind information. It will tell you how strong the wind is and in which direction it goes. Going against the wind with your ship's sails unfolded will slow your ship's movement. However, going in the direction of the wind with the ship's sails unfolded will increase its movement speed at a rate relative to the strength of the wind.
The cannon icons on both sides show you information on the firing cooldown and the number of cannonballs you have left.
◈ Fold & Unfold the Sails
On large ships, you can fold and unfold the sails by pressing the button in the ship's speed bar.
When the sails are opened up, the ship is affected by the ocean winds. However, when the sails are folded, the ship will not be affected by the ocean winds. Therefore, you can sail more quickly by folding or unfolding the sails depending on the ocean winds of the area you are in.

If you see the above appear around your ship speed gauge, it means you have entered an Oquilla current. These will boost your ship's speed.
◈ Anchor
While on a ship, the Anchor UI will be activated whenever you approach a Papu or Otter Barterer NPC around the islands of the Great Ocean.

Note that you must be holding onto the steering wheel of the ship in order for the Anchor UI to appear.
It offers the following options:
- Anchor: Activates features available on islands and other specific locations such as certain shipwrecked ships out in Margoria.
- Explore / Supply: Sends sailor(s) to islands to explore or get supplies. You can supply the rations you have loaded on your ship with Supply and find treasures with Explore. In order to use Explore or Supply, you need to have at least 100,000 rations loaded on your ship. Once you begin exploring or supplying at any island, you can restart them only after 20 minutes.
- Barter: You can engage in bartering activities with a nearby Barterer NPC.
Please note that the ship will stop if you press the Anchor button, and it will not move until you press the Depart button.
◈ Board & Disembark
Any Adventurer atop a ship can see the Board and Disembark buttons appear on their screen.
Pressing the Disembark button will instantly teleport them to land, as long as there's a wharf manager nearby. Note that, if you're on the wheel, you will need to press the Disembark button once to take you off the wheel, and press it again to move to the wharf manager. This function has a 5-second cooldown, and it can be set to a hotkey via Settings → Interface Settings → UI Hotkeys.
Like with the disembark function, remember that you can likewise instantly teleport to your nearby ship from shore by left-clicking the ship's icon (anchor-shaped) beneath your character's HP bar, or by pressing the Board button that appears above the Disembark one. Pressing the Board button again while aboard your ship will take you to the ship's wheel.
◈ Sailors
You will find various kinds of sailors around Velia, Port Epheria, and Iliya Island. If you have a sailor contract certificate item on you, you can hire them.
These certificates can be purchased for 3,000,000 silver from Philaberto Falasi at Port Epheria, and Islin Bartali at Velia's Lunar Halo Inn and Proix at the Dancing Marlin Tavern, both in Velia.
The health of sailors, called their condition, can be recovered by offering them chowder and raisin bread.
- Chowder can be obtained via cooking with a cooking utensil at a residence with the following ingredients: Dried Pearl Oyster Flesh x1 or Dried Shellfish x5, Pepper x2, Pork x2, Milk x1, Teff Bread x1
- Raisin Bread can be purchased from Islin Bartali in Velia, and from the different wharf managers.
If ill, a sailor can be cured with an Elixir of Regeneration.
This elixir can be obtained through simple alchemy (hotkey: L) with the following materials: Mandragora Essence x1, Essence of Nature x1, Oil of Regeneration x1, Troll Blood x2, Grape x4.

You can check the status of the sailors assigned to your ship in the Sailor Info tab of the Ship Info window, opened automatically when accessing your character's profile while steering a ship (hotkey: P).
To cure an ill sailor or recover its condition, check in your ship in a wharf, and then select the Manage Sailors option.
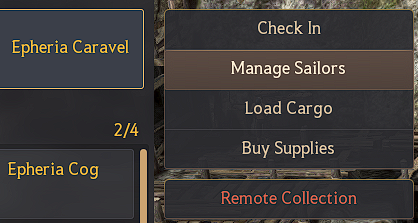
After this, select the sailor you want to help and offer them the necessary items.

Once they're recovered, the Board option in the bottom right side of the window will be enabled, allowing you to attach the sailors once more to your ship.
If you ask yourself how many sailors you can have at any moment in your ship, it depends on the capacity of the ship, your maximum number of sailors, and how many cabins each sailor occupies. For example, an Epheria sailboat only has 10 cabins, while an Epheria carrack has 100. Using the example above, sailor Arkahn may only use 3 cabins when assigned to a ship, but his stats are worse than sailor Icaron who uses 10 cabins.
To increase the maximum number of sailors you can have, you will need the item Sailor's Oath. These oaths are obtained from quest rewards during Oquilla's Eye's questline [The Great Expedition] First Sailboat into Oquilla's Eye and from the quest Chulong's Gift, unlocked after doing the previous questline, in Nampo's Moodle Village at the other side of the ocean. You can check it in the Suggested tab of the Quests window (hotkey: O). Please make sure to not delete these before using them, as they cannot be obtained again.

Sailors receive EXP and grow from defeating sea monsters and doing regular and special barters.
| Number of Boarded Sailors | EXP Ratio per Sailor | Total EXP obtained by all boarded sailors |
| 1 2 3 4 5 6 7 8 9 10 |
100% → 100% 60% → 65% 40% → 53.3% 35% → 47.5% 28% → 44% 27% → 41.7% 23% → 40% 23% → 38.8% 20% → 37.8% 18% → 37% |
100% → 100% 120% → 130% 120% → 160% 140% → 190% 140% → 220% 160% → 250% 160% → 280% 180% → 310% 180% → 340% 180% → 370% |
| 11 12 13 14 15 16 17 18 19 20 |
18% → 36.4% 17% → 33.3% 15% → 30.8% 14% → 28.6% 13% → 26.7% 13% → 25% 12% → 23.5% 11% → 22.2% 11% → 21.1% 10% → 20% |
200% → *400% 200% → 400% 200% → 400% 200% → 400% 200% → 400% 200% → 400% 200% → 400% 200% → 400% 200% → 400% 200% → 400% |
* If more than 11 sailors are on board, the obtained EXP will be multiplied by 400% and then distributed equally among all the sailors.
For example, if there are 30 boarded sailors, the obtained EXP x 400% is equally distributed to the 30 sailors, each receiving approximately 13.3%.
For example, if there are 30 boarded sailors, the obtained EXP x 400% is equally distributed to the 30 sailors, each receiving approximately 13.3%.
◈ First Mates
A total of 3 NPCs are available to board your ship as first mate.
| [First Mate] Proix | [First Mate] Cleia | [First Mate] Tranan Underfoe |
 |
 |
 |
Once a first mate comes aboard your ship you will be able to navigate to confirm your location and auto-navigate in the Great Ocean.
The first mate can only be assigned to the "First Mate" preset slot for the following vessels.
- Epheria Carrack: Advance
- Epheria Carrack: Balance
- Epheria Carrack: Volante
- Epheria Carrack: Valor
- Panokseon
Hiring a First Mate Notes
- The first mate is not included in the cabin upon boarding a vessel.
- When hired, the first mate will be added to the Sailor List.
- Like regular sailors, if the first mate's condition deteriorates, they will fall ill and must be treated with an Elixir of Regeneration or Tears of the Star.
- If a first mate falls ill while on board, any of their active effects will not be applied.
- The first mate cannot be fired.
◈ How to Hire First Mates
You can hire each of the three unique first mates via the following methods:
|
[First Mate] Proix
|
How to Hire
Complete the [The Great Expedition] In Search of Khan, the Eye of the Moon quest and then complete the questline available via NPC Proix in Velia to obtain
- [First Mate] Reunion on the Horizon
- [First Mate] Tides of Conversation - [First Mate] Call of the Sea * You can find [The Great Expedition] In Search of Khan, the Eye of the Moon under Quests (O) - Suggested - [The Great Expedition] First Sail Boat to Oquilla's Eye. Trait
- Improves your BreezySail duration while boarded
|
|
[First Mate] Cleia
|
How to Hire
Obtain the
- [First Mate] Memento of the Past
- [First Mate] Moment of Resolve
- [First Mate] Set Sail for New Horizons
- Decreases Parley required for Bartering by 10% while boarded
- The reduced Parley can be checked through the Barter Information window while steering the ship.
|
|
[First Mate] Tranan Underfoe
|
How to Hire
Obtain the
- [First Mate] A Certain Adventurer's Sea-journ
- [First Mate] Dream of the Open Sea
- [First Mate] A Sea of Conviction
- The following function becomes available while boarded
- This function becomes available as the "Ship Auto Repair" button while steering the ship.
- To use the "Ship Auto Repair" function, you must have one of the following items in the ship's inventory.
* Ship Repair Material, Ship Repair Kit, Emergency Ship Repair Kit
|
◈ Manage Sailors UI
These are the effects you will be able to obtain when assigning a sailor to a part of your vessel.

| First Mate | Only the First Mate can be placed here, and each First Mate's effects will be applied upon placement. |
| Sail | The Endurance/Wits stats of the sailor placed here are doubled. |
| Wheel | The Awareness/Strength stats of the sailor placed here are doubled. |
| Cannon | The Focus/Force/Vision stats of the sailor placed here are doubled. |
| Deck | The ship's durability increases by 10,000 for each Cabin Cost of the sailor placed here. |
| Mess | The ship's rations increase by 5,000 for each Cabin Cost of the sailor placed here. |
| Cabin | The base stats of the sailor are applied. |
All slots, except for the cabin, can accommodate one placement by default. However, additional slots are available for specific ships as follows:
| Ship | Trait |
| Epheria Carrack: Advance | Mess +1 slot |
| Epheria Carrack: Balance | Sail +1 slot |
| Epheria Carrack: Volante | Sail +1 slot |
| Epheria Carrack: Valor | Cannon +1 slot |
| Panokseon | Cannon +2 slots |
You can arrange your sailors to see who has the highest stats in each category.
- You can filter sailors by type to see only the ones you need.
- You can switch back to view all sailors whenever you like.
There is also an auto-assign sailors function.

Auto assign is applied in the following order:
| First Mate → Sail → Wheel → Cannon → Mess → Deck → Cabin |
Sailors in the list are sorted in the following order:
| Sailors who can board the current ship → Sailors already on the ship → Sailors on other ships |
◈ Sailor Preset
Added the Sailor Preset feature.

The Sailor Preset can only be applied to the ships listed below that can board sailors.
| Bartali Sailboat | Epheria Sailboat | Epheria Frigate |
| Improved Epheria Sailboat | Improved Epheria Frigate | Epheria Caravel |
| Epheria Galleass | Epheria Carrack: Advance | Epheria Carrack: Balance |
| Epheria Carrack: Volante | Epheria Carrack: Valor | Panokseon |
The Sailor Preset is applied differently for each type of ship. For example, a Sailor Preset saved in Epheria Carrack: Advance Preset 1 will not be saved in Epheria Carrack: Volante Preset 1, so you will need to set it up separately.
When applying the Sailor Preset, only sailors who are not sick or currently on another ship will be assigned.
How to Use Sailor Preset
- Talk to the Wharf Manager NPC to access "Manage Sailors" for your ship.
- In the Manage Sailors UI, assign sailors as you wish.
- Once you are done, press the Save Preset button to save your settings.
◈ Sailor Fishing
A special sailor slot lets you automatically fish while sailing the ocean on a Carrack. To activate this feature, you'll first need to acquire the Oceanbound Otter Fishing Rod and a fishing sailor. Here's how you can do that:
| Oceanbound Otter Fishing Rod | How to Obtain |
 |
Complete the Suggested "[The Great Expedition] Otter Barterer" quest and then complete the "[Sailor Fishing] An Otterly Good Friend" quest via [Fish Vendor] Crio in Velia. * The quest objective is to hand over Crow Coin Coupon x 200 to Crio. * If you have completed [Sailor Fishing] An Otterly Good Friend, you can exchange additional rods with Crio. * The Prize Catch group consists of Prize Fish and Ancient Relic Crystal Shard. |
Be sure to assign a sailor to the Fishing slot to enable automatic fishing while sailing.

Carrack Sailor Fishing Rules
* Carrack Sailor Fishing occurs once every 180 seconds. (The sailing UI gauge on the right charges the fishing progresses.)
* Fishing progresses only while the Carrack is sailing, and does not progress when stationary. (Fishing continues during Ram, Power Accel., BreezySail, QuickRetreat, AbruptTurn, and SmoothTurn.)
* Fishing gauge does not reset even if you release and then re-engage the Carrack's controls.
* Fish caught through Carrack Sailor Fishing are obtained in the character's inventory. If a fish tank is present, they are obtained in the tank.
* Only the Prize Catch Fish Rate from the fishing rod's effects is applied. The Prize Catch Fish Rate does not increase with Fishing Mastery.
- The Prize Catch Fish Rate is fixed at 3% when using the Oceanbound Otter Fishing Rod for Carrack Sailor Fishing.
- The Prize Catch group consists of Prize Fish and Ancient Relic Crystal Shard.
* Fish caught through Carrack Sailor Fishing are subject to both the Weekly Fishing Contest and Fish Guide.
* Catching fish through Carrack Sailor Fishing affects the fishing resource of the respective sea area.
* Carrack Sailor Fishing occurs once every 180 seconds. (The sailing UI gauge on the right charges the fishing progresses.)


* Fishing progresses only while the Carrack is sailing, and does not progress when stationary. (Fishing continues during Ram, Power Accel., BreezySail, QuickRetreat, AbruptTurn, and SmoothTurn.)
* Fishing gauge does not reset even if you release and then re-engage the Carrack's controls.
* Fish caught through Carrack Sailor Fishing are obtained in the character's inventory. If a fish tank is present, they are obtained in the tank.
* Only the Prize Catch Fish Rate from the fishing rod's effects is applied. The Prize Catch Fish Rate does not increase with Fishing Mastery.
- The Prize Catch Fish Rate is fixed at 3% when using the Oceanbound Otter Fishing Rod for Carrack Sailor Fishing.
- The Prize Catch group consists of Prize Fish and Ancient Relic Crystal Shard.
* Fish caught through Carrack Sailor Fishing are subject to both the Weekly Fishing Contest and Fish Guide.
* Catching fish through Carrack Sailor Fishing affects the fishing resource of the respective sea area.
Fishing gauge resets in the following situations:
- When the fishing rod is unequipped or replaced in the Carrack equipment slot.
- When the ship is checked into the wharf or destroyed.
- When moving to the character selection screen or exiting the game.
Fishing is paused in the following situations:
- When the Durability of the Oceanbound Otter Fishing Rod is fully consumed.
- When the sailor placed in the fishing slot in the Manage Sailors UI is sick.
- When the ship is stationary.
Fish Discard:
Just like in regular fishing, you can have sailors automatically toss out any fish below the grade you choose
◈ Emergency Ration Supply
If you find yourself with low rations in the middle of the high seas, don't worry. You can supply food you have in your inventory to the ship as emergency rations.
Foods of different quality restore different amounts of rations:
- White Grade: 80
- Green Grade: 100
- Blue Grade: 240
- Yellow Grade: 4000
- Orange Grade: 22000
Note that food items used to restore stamina of land workers and those that cannot be registered on the Central Market cannot be used as emergency rations.
◈ Ship Skills
Starting with improved Epheria sailboats and frigates, a large variety of skills can be used when sailing with your ship. These skills are unlocked the higher your character's sailing life skill level is.
The following are the skills you can use on a ship, and the key commands required for activating them.

BreeztSail and Power Accel can be used in succession to improve the navigation in the sea. Other skills, like Ram, Focus Fire, Volley, or Bull's-Eye improve your naval combat capabilities
◈ Sailing Log
These adventurer's tomes increase your ship's speed for various situations.
Srulk and Loggia sailing logs are available for purchase from certain town vendors, while the Manos sailing log needs to be crafted or purchased from the Central Market.
You can craft the Manos sailing log with siren song auras, a guaranteed item drop from Hollow Maretta, a siren-like monster found in Margoria.
|
Manos Sailing Log |
|||
|
How to Obtain |
Item Effects |
||
|
Manufacture (hotkey: L) Siren Song Aura x3 Manos Stone x5 Magical Shard x50 Supreme Tough Hide x50 |
Sailing EXP +10% Sailing Mastery +5 to +400 (based on enhancement level) Max Big Ship Speed +15% Max Big Ship Auto-sail Speed +15% Big Ship BreezySail Speed +15% Big Ship Auto-BreezySail Speed +15% |
||

Bartering
The trading of the sea, while bartering you will be exchanging specific items for other items at certain NPCs, called barterers, mainly around the different islands north of the continent.
Each item has a specific grade, and through the Bartering window one is able to see which item each Barterer NPC seeks in exchange for a higher grade item. You can access the Bartering window via the main menu (hotkey: Esc) → Life → Barter. You can also access it through the Load Cargo window when moving bartering items from and into your ship, via the Barter Information button, and from the Search Barter button at the bottom right part of the World Map screen (hotkey: M).
Sea trade goods, also known as bartering items, are categorized into different grades, called levels. Level 1 barter goods appear in gray, level 2 in green, level 3 in blue, level 4 in yellow, and level 5 in red.
A barterer on an island will, for example, ask you for [Level 1] Raft Toy x1, and in exchange will give you [Level 2] Conch Shell Ornament x2.
Barterers might give you 1 or more items during the barter exchange.
You can exchange the same item as many times as it is determined in the Bartering window.
Bartering can only be done on a ship, and via any papu or otter barterer who has been sent to each island, or sailors who have drifted to Margoria. The exchange and loading will automatically take place if the necessary item(s) is in the ship. Each bartering exchange will consume parley points. These are renewed per bartering refresh cycle.
Trade items that are used for bartering can only be loaded through the Load Cargo feature from a Wharf Manager NPC. Note that you cannot barter items in your character's inventory.

Barter items will be destroyed when large ships are destroyed, or when remotely collected to a wharf.

The barter window, seen above, will give you all the necessary details about the exchange at that location. What item you have, how many you have of that item, what you will receive in return, how many exchanges are allowed, your current ship's weight capacity, how much weight will be gained or lost when doing a single exchange, and how much parley will be consumed per barter. It also lets you exchange all the items you have at once, instead of exchanging them one by one.
The following barters can happen in island nodes in the ocean.
|
Level 1 Trade |
Land materials → Level 1 trade goods |
|
Level 2 Trade |
Level 1 trade goods → Level 2 trade goods |
|
Level 3 Trade |
Level 2 trade goods → Level 3 trade goods |
|
Level 4 Trade |
Level 3 trade goods → Level 4 trade goods |
|
Level 5 Trade |
Level 4 trade goods → Level 5 trade goods |
|
Final Trade |
Level 5 trade goods → Crow Coin |
|
Other Trades |
Trade goods → Ship materials & enhancement materials |
Some barters will offer you materials that are needed for upgrading to better ships, or ship equipment enhancement materials.
Level 5 barter goods, and occasionally level 4 ones, can be exchanged for crow coins.
You can check the crow coins that you have obtained up to that point below the weight bar in your inventory (hotkey: I).

Level 3 barter goods and above can also be sold for silver. The higher the level of the trade good is, the higher the price will be.
The storage keepers from each territory became interested in bartering, and thus started to buy trade goods. You can sell Lv. 3–5 trade goods at the existing shops as well. You can only sell Lv. 5 trade goods at a town storage's currency exchange.
|
Level 1 trade goods (100LT) |
N/A |
|
Level 2 trade goods (800LT) |
N/A |
|
Level 3 trade goods (900LT) |
1 million silver (can be sold) |
|
Level 4 trade goods (1000LT) |
2 million silver (can be sold) |
|
Level 5 trade goods (1000LT) |
10 million silver (can be sold) |
The bartering item list can be reset by pressing the Barter Refresh button in the upper right of the Barter Information window. This will reset both the items offered for bartering, and the amount of parley required to barter them with.

At first, bartering will be offered to you from only a small number of islands, but as you do more bartering, you will get offerings from more papus and otters from many more islands.
When you click on a trade good from the Barter window, the window will move to the trade good that is required to obtain it.
Everyday at 06:00 UTC, your barter refresh points will be reset to 100. If you have an active value pack, you can recover 50 extra barter refresh points (i.e. Your points will be reset to 150 instead of 100).
The number of barter refresh points consumed when using the Barter Refresh function depends on the number of barters you have left for that day. Using instant refresh will consume an additional 30 points.

Additionally, if you have some Lv. 1 trade goods you do not need, you can visit Gerio and Tidio, in Beiruwa Island and Barater Island respectively, to exchange them up to four times for a Lost Trade Box. Opening this box will give you a barter trade good from Lv. 1 to Lv. 5, at random.
◈ Ship Material Barter
Due to the increasing demand for materials to upgrade ships, the Crow Merchants Guild now provides separate bartering opportunities for them, called "Ship material barter".
However, there will be some exceptions for certain ship upgrade materials.
You can use the Ship Material Refresh function from the Refresh Barter window twice a day. When you use the Ship Material Refresh function, there is a small chance that you will uncover all the possible barters you can make for crow coins at every island. You can use crow coins to barter any Level 2 to 5 sea trade goods when this happens.
During ship material barter, you will get materials for upgrading a ship. You may also get materials to enhance ships, as well as treasure-related items.
The accumulated number of exchanges needed to barter for the following items will drastically decrease when using ship material barter.
- Brilliant Pearl Shard
- Brilliant Rock Salt Ingot
The ship materials you can obtain by doing ship material barter are as follows.
|
- Island Tree Coated Plywood - Rock Salt Ingot - Cobalt Ingot - Cox Pirates' Artifact (Parley Beginner) - Bright Reef Piece - Pure Pearl Crystal - Deep Sea Memory Filled Glue - Cox Pirates Extermination Seal - Tide-Dyed Standardized Timber Square - Luminous Cobalt Ingot - Great Ocean Dark Iron - Seaweed Stalk - Cox Pirates' Artifact (Parley Expert) |
- Ruddy Manganese Nodule - Enhanced Island Tree Coated Plywood - Moon Scale Plywood - Moon Vein Flax Fabric - Violent Sea Monster's Scale - Saltwater Crocodile's Scale - Brilliant Rock Salt Ingot - Brilliant Pearl Shard - Cox Pirates' Artifact (Combat) - Oquilla's Flower - Tear of the Ocean - Deep Tide-Dyed Standardized Timber Square |
◈ Special Barter
As you proceed with bartering, you can be offered a special barter from the bartering NPCs of each island, at a low chance.
Special barters are barters that randomly occur by chance while using regular bartering. Though they do not happen often, you can obtain a very expensive item or a large number of crow coins through these special barters. You can get either crow coins or expensive goods you cannot get from a regular barter by using gold bars at a special barter.
The more you barter, the more chance a special barter may occur.

You will see the items you can exchange through special barter only when you have reached the relevant island. The islands where special barters can be carried out are displayed with a gold badge icon in the World Map (hotkey: M) Barter Information UI.
You can see the information about the areas where Special Barters are available in the Barter Information window.

Whenever a special barter is made available, a system message will be displayed.
Once you are on an island with a special barter available, you can select either the Normal Barter or Special Barter options from the Bartering window.
Please note that the item information does not change every 2 hours for special barter opportunities. If you do not make the exchange when special barter is available, it will no longer appear.
Ravinia's & Livenia's Crow Coin Shop
You can use this shop through Ravinia at Crow's Nest or at Livenia at Oquilla's Eye, the Crow Coin Exchange NPCs .
Crow's Nest is the island covered in fog managed by the Crow Merchants Guild, located north of Tinberra Island. Many at sea, both wealthy and unfortunate alike, search for its location for one or another reason.
There, you can purchase items such as Khan's Concentrated Magic and other ocean-related goods such as equipment for a carrack, ship upgrade materials, or ship equipment enhancement materials.
Please note that for most of the items offered by Ravinia & Livenia to be purchased with crow coins, their cost in crow coins is a lot higher than it is to obtain the item directly by yourself. As such, it is better to purchase items from Ravinia & Livenia only when you need a few of a single type, in case of needing ship upgrade materials for example. Other items you will require, however, will need to be purchased from Ravinia & Livenia. It is recommended to save your crow coins for when you are at that point in time.
– List of Items Sold by Ravinia & Livenia


◈ Rebinia's Shop
On different places you will encounter Rebinia, one of Ravinia's sisters, who has opened up a crow coin shop there and sells useful common items, as well as rare Manos accessories.
She can be found in Lema Island, Iliya Island, Port Epheria & Velia.
You can purchase the following items from Rebinia's shop. Remember that you can only purchase the special, limited boxes containing the items below from Rebinia.
– List of Items Sold by Rebinia


Epheria Galleon
The Epheria galleon is one of the greatest ships the world of Black Desert has ever seen.

It can be obtained in two ways:
– When a special barter appears during barter, there is a low chance for the item "Epheria's Star" to be obtainable.
– The guild victorious in a conquest war in the territories of Calpheon, Mediah, and Valencia is rewarded the item "Epheria's Star".
Please note you will find it in the guild's storage. Only the guild master can move Epheria's star from the guild storage, and award a deserving guild member via the Present button found at the bottom of the guild's storage window.

With this item in your inventory, you can accept a special quest from Philaberto Falasi in Port Epheria. Complete this quest to obtain the ship license for an Epheria galleon, and the Captain Epheria title, which is a temporary title that lasts for 7 days.
You can only ride and control an Epheria galleon for the duration of the title Epheria Captain, and you can only access other features if you do not have the title or if it has expired.

Please note that the fire rate and max range of an Epheria galleon's cannons is identical to an Epheria carrack's cannons, that Epheria galleons cannot equip ship equipment, and that the cost of repairs for an Epheria galleon is 10 million silver per 10% of damage. (Damage increases upon remote collection or ship destruction)
Like with Epheria carracks, Epheria galleons need to be supplied upon initial registration.
Panokseon
In the Land of the Morning Light it is possible to craft a panokseon, a ship that embodies the beautiful and robust spirit of the territory.While the panokseon is quite slow due to its weight, and its stats are comparatively lower than that of the Epheria carrack, its distinctive characteristics are the large number of crew members it can accommodate and its sturdy deck cover structure that gives the ship high defensive stats. Additionally, it has higher ram damage than the Epheria carrack.

However, as the vessel is made with considerably high technological expertise relative to its era, the construction process is not an easy task. It requires significant assistance from the people of Moodle Village, thus it is crucial to maintain strong relations with them through activities such as eliminating the Goldmont Pirates that threaten the village, exchanging currencies or crow coins, and more.
◈ How to Craft
The panokseon can be crafted at the house Moodle Village 4 Shipyard Lv. 1.
|
Ship License: Panokseon |
|
|
Crafting Materials |
How to Obtain |
|
Blueprint: Panokseon x30 |
Complete the quest [Weekly] Pirate Trouble from Yooan, the Nampo Moodle Village wharf manager (Obtain Blueprint: Panokseon x2 upon completion) |
|
Wooden Nail Soaked in Seawater x250 |
Defeat [Outlaw of the Vadabin Sea] Goldmont Small/Medium/Large Battleship |
|
Finely Polished Pine Plywood x300 |
Exchange Sangpyeong Coin x10 with Yooan, the Nampo Moodle Village wharf manager |
|
Glue With Traces of Deep Waves x200 |
Exchange Crow Coin x500 at the Crow Coin Shop |

➤ For more information about the different features that make use of the sailing and bartering life skills, please check the [The Great Expedition] page.
* The content of the game guide may differ from the actual game content, depending on the update and content changes.