
World Map
Last Edited on : Sep 8, 2026, 10:25 (UTC)
Unlike many other games, the World Map in Black Desert is fully rendered in 3D.
While it can feel overwhelming at first glance, you will quickly find it to be one of the most intuitive and versatile maps in any MMORPG.
As you dive deeper into your adventures, you will frequently rely on its vast array of tools and functions. Managing your trade routes, workers, and resources from the map can even make it feel like you are playing an immersive strategy simulation game right from the map screen alone.
How to Open World Map
To open World Map, you need to be level 15 or up or have completed the tutorial in the beginning of the adventure. After these conditions were met, press short cut key ‘M’, or press ESC to find the menu.
Press [ESC] and click on the World Map icon in the center or press short cut key M to open World Map. You can also try a renewed menu by clicking the New Menu button at the bottom, which will entirely change your [ESC] menu interfacte, choose the one you prefer.
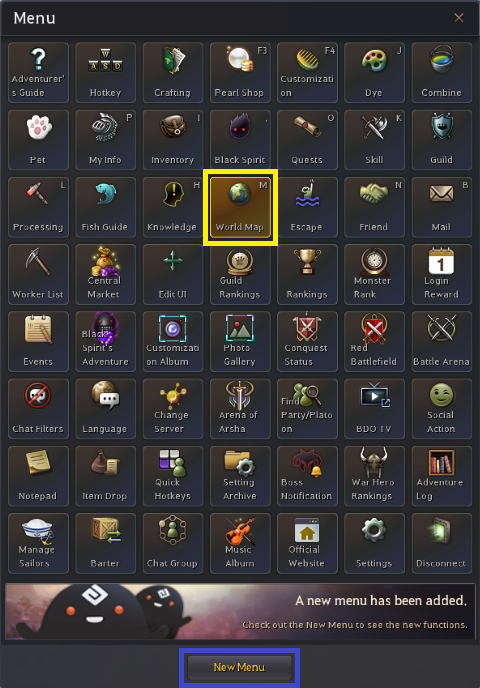
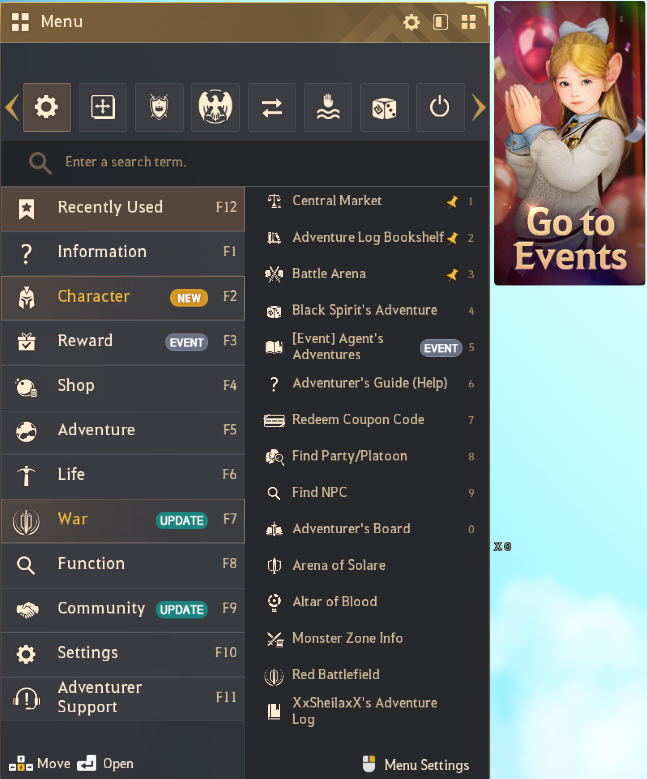
World Map Information
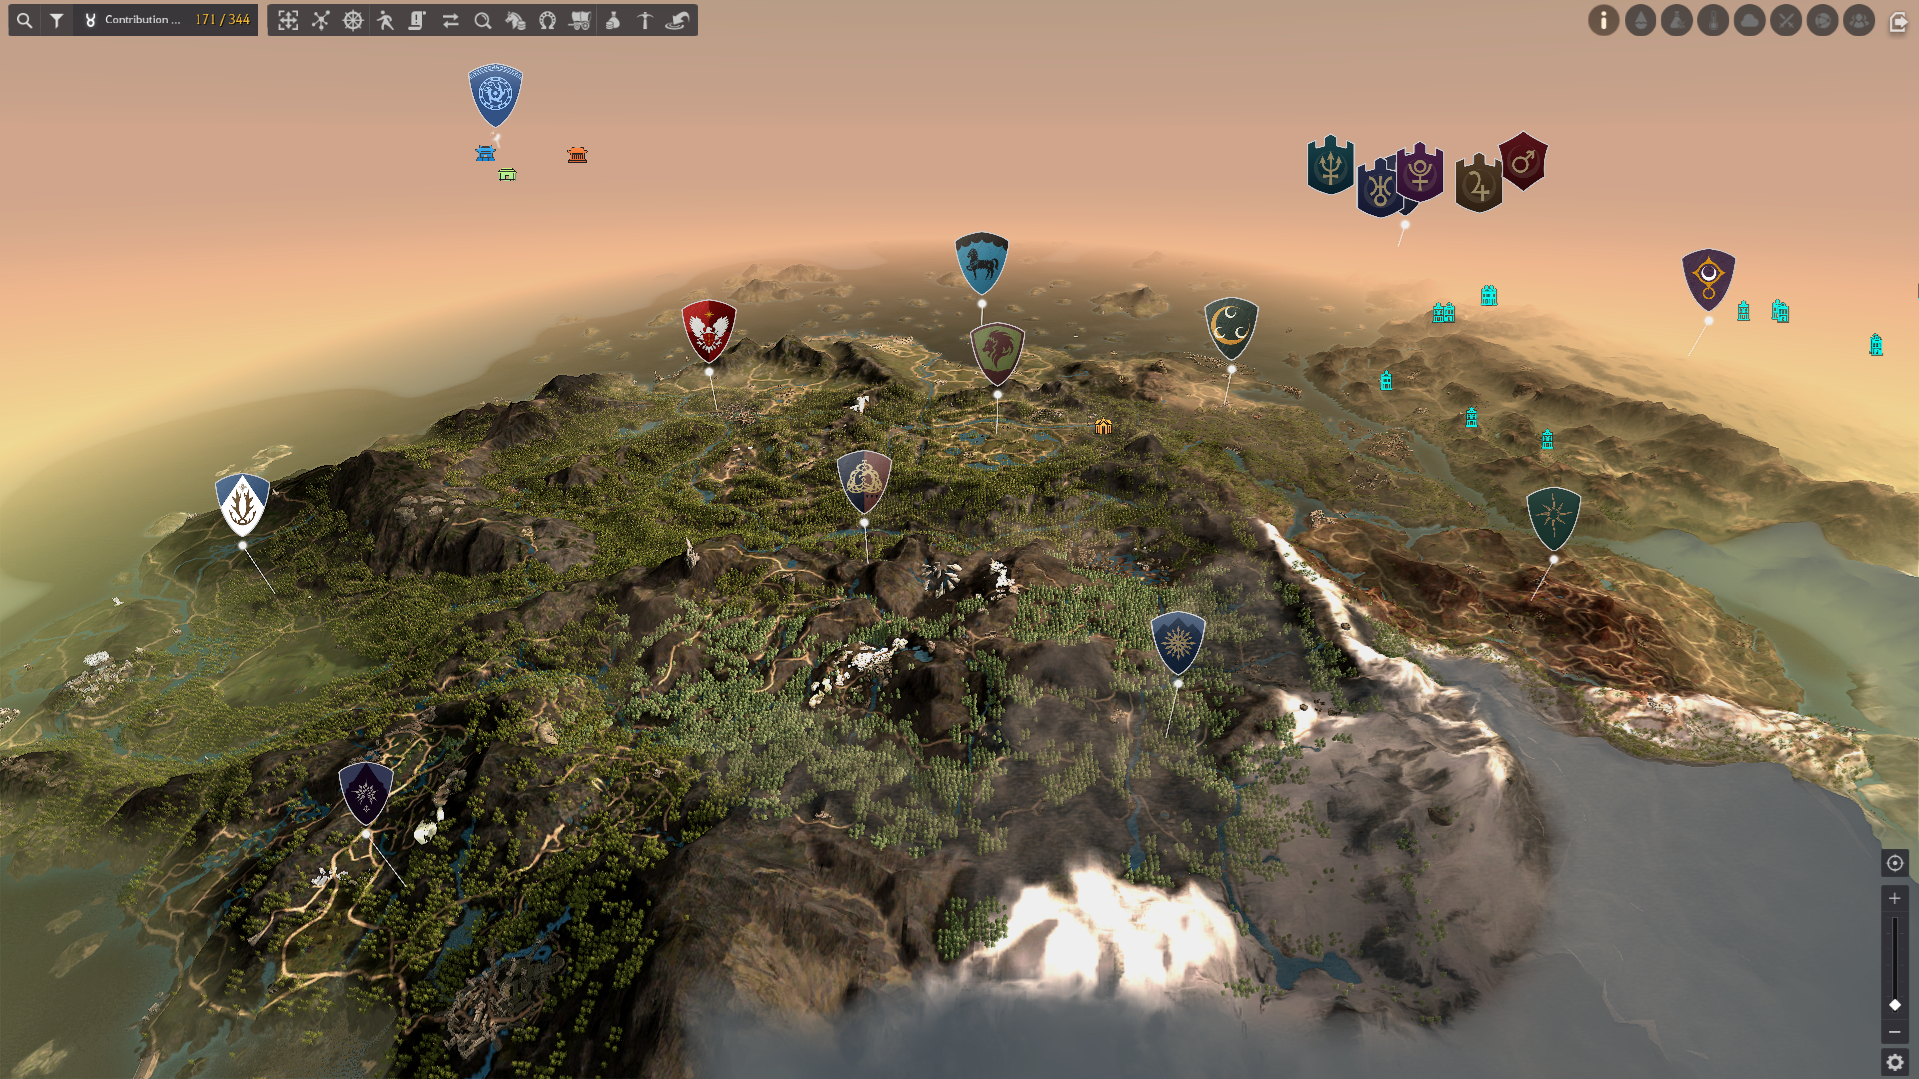
When you open World Map (M key by default), you will be welcomed with a vast continent to explore. Have in mind that non explored areas will have a fog until they are discovered, you will also see a variety of different icons representing the different types of NPC that the game offers. Down below you will find a chart explaining each icon.
|
Icon |
Name |
Function |
|
|
Major city (Node) |
Major cities are where most NPC related to Trading, Warehouse access, Housing, Transport, Character Transport Facility are available. (e.g. Velia, Heidel, Calpheon etc.) These cities can be used as base node upon discovery and there are Chief or lord-grade main NPC who shows you Lordship Menu. |
|
|
Town (Node) |
It is a general town. Some services are not available (e.g. there could be no warehouse, etc), but most merchant NPCs can be found, in other words, most features of a town are available. |
|
|
Empty House |
Each house can be used differently by investing contribution points. They offer different services such as town storage increases, refinerys, residences, workshops and much more. Their usage can be changed whenever you want and you will receive your contribution points back, but the silver costs to obtain them wont be restored. |
|
|
Guild House |
Guild house can be adquired by bidding for it through auctions. You can produce certain items using a Guild House. |
|
|
Manors |
Currently, there are several Manors in Black Desert, each represented by a unique icon on the map. These manors can function as a standard residence while also being assigned to your guild, granting all members convenient access to guild buffs from any location. Please note that an active rental contract is required to enter your manor. However, any items placed inside will remain safe even if your contract expires. |
|
|
Investment Bank |
Assign workers and invest your gold bars to generate profit but have in mind that your deposits may lead to a loss of capital. The Investment Banks can only be used by adventurers with a Rank 1 residence in that Town or Major city. |
|
|
Trade (Node) |
Trade, House, Production Node are available. |
|
|
Gateway (Node) |
It is a Borderline Area where you do not know when the danger will come. Trade facilities are available at large camps and night raids are ongoing. Occasionally there is NPC such as General Goods Vendor. |
|
|
Danger Zone (Node) |
It is a dangerous area surrounded by monsters, occasionally you can use the affiliated Production Node. |
|
|
Pathway (Node) |
It is the place where the Node Manager is alone or an object is there as a replacement for the manager to it. |
|
|
Exacavation (Subnode) |
Subnode that will provide you excavation materials such as traces and others if you assign a worker to it. |
|
|
Mining |
Subnode that will provide you with minerals and a variety of materials if you assign a worker to it. |
|
|
Farming (Subnode) |
Subnode that will provide you with farming materials if you assign a worker to it. |
|
|
Lumbering (Subnode) |
Subnode that will provide you with lumbering materials if you assign a worker to it. |
|
|
Cargo |
This icon will appear next to a Major City or Town once the items sended using the transport function arrived to their destiny. Their location is updated in real time. |
|
|
Party member |
When you are involved in a party, the location of myself and party members are indicated with this icon. As party members move, the location is updated in real time |
|
|
Bandits |
This icon indicates the location where the bandits appear. Bandits appear only when I have trade goods in my inventory or I travel with a mount loaded with trade goods. |
|
|
My Mount |
This icon indicates where My Mount(Horse, Camel) is located now |
|
|
My Ship |
This icon indicates where My Ship (Raft, Rowboat, Fishing boat) is located now. |
|
|
Death |
This icon indicates the location where I and my guild mates died |
|
|
NPC Services (Knowledge) |
The icons represent each type of NPC service available in your location. The icons are represented in gray before you acquire the corresponding knowledge, but it changes to green after you acquire it. NPC knowledge icon means the location and class of NPC, Monster/Fish icons indicate where they will appear. You can easily understand the game if you pay attention to these small icons. |
|
|
Abyssal Well |
Fast travel points that can be used for a small fee to travel between Major cities. There is certain quest requirements to be able to use them. |


The icons introduced in the above table are the most basic ones, there are more variety of icons but this will give you a rough idea and understanding. Once you get familiar with these, other icons will be easily understandable.
One thing to have in mind is that the above icons are all right-clickable. If you right-click the icon, an auto-route guidance will be generated and you can go to that location easily by pressing ¨T¨ after you exit the map.
Also, in the World Map, there is a compass arround your character that shows weather and time information. You can see a circle drawn around the position where you stand. The position of the sun and the moon changes across the circle and is updated in real time.
Next to the sun and the moon, the in-game time is shown as well. In the Black Desert world, the sun and the moon rise in the northwest and move to the southeast. You can also find the raining areas easily because of the raining effect shown on the World Map. Check images below:
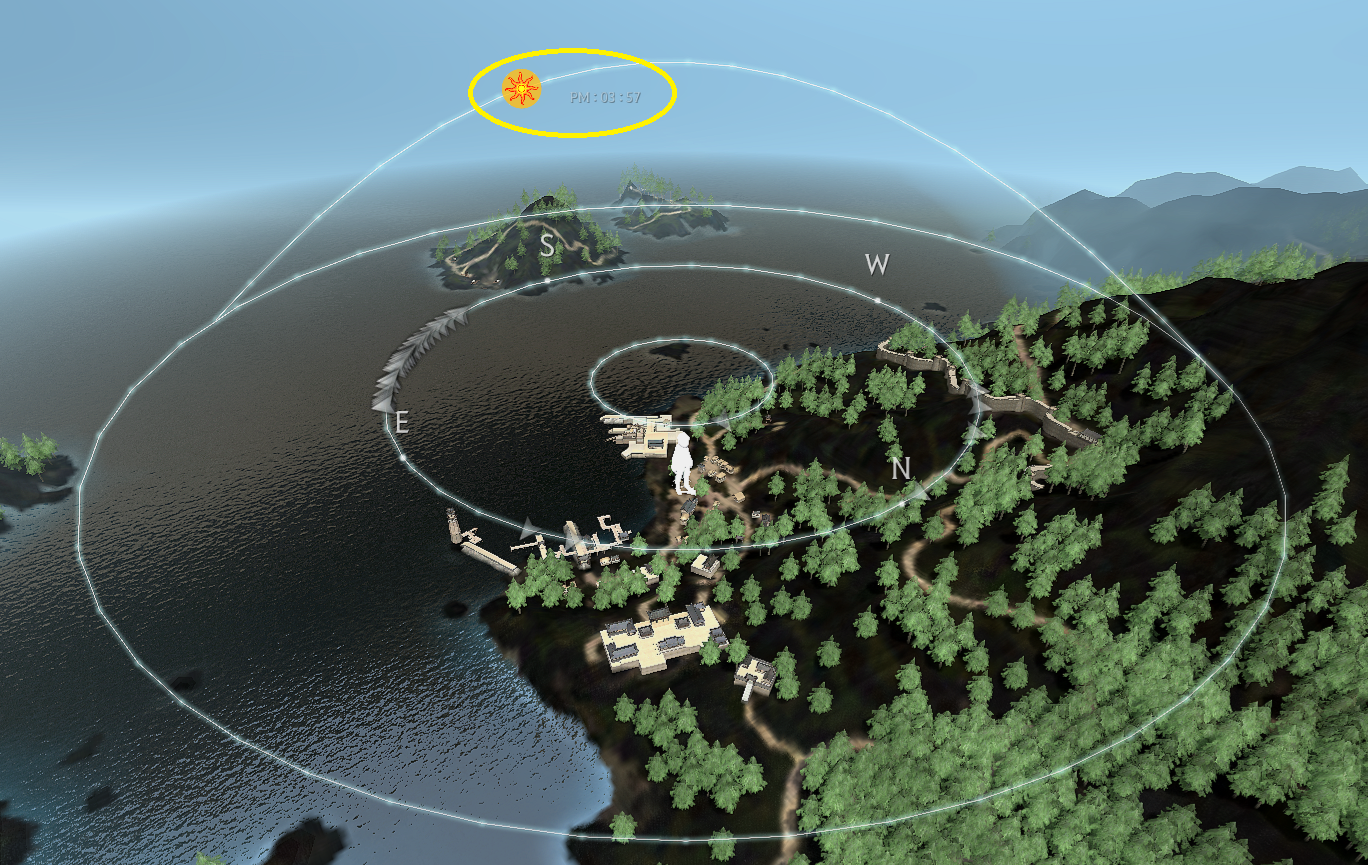
▲ 03:57 pm. Day time.
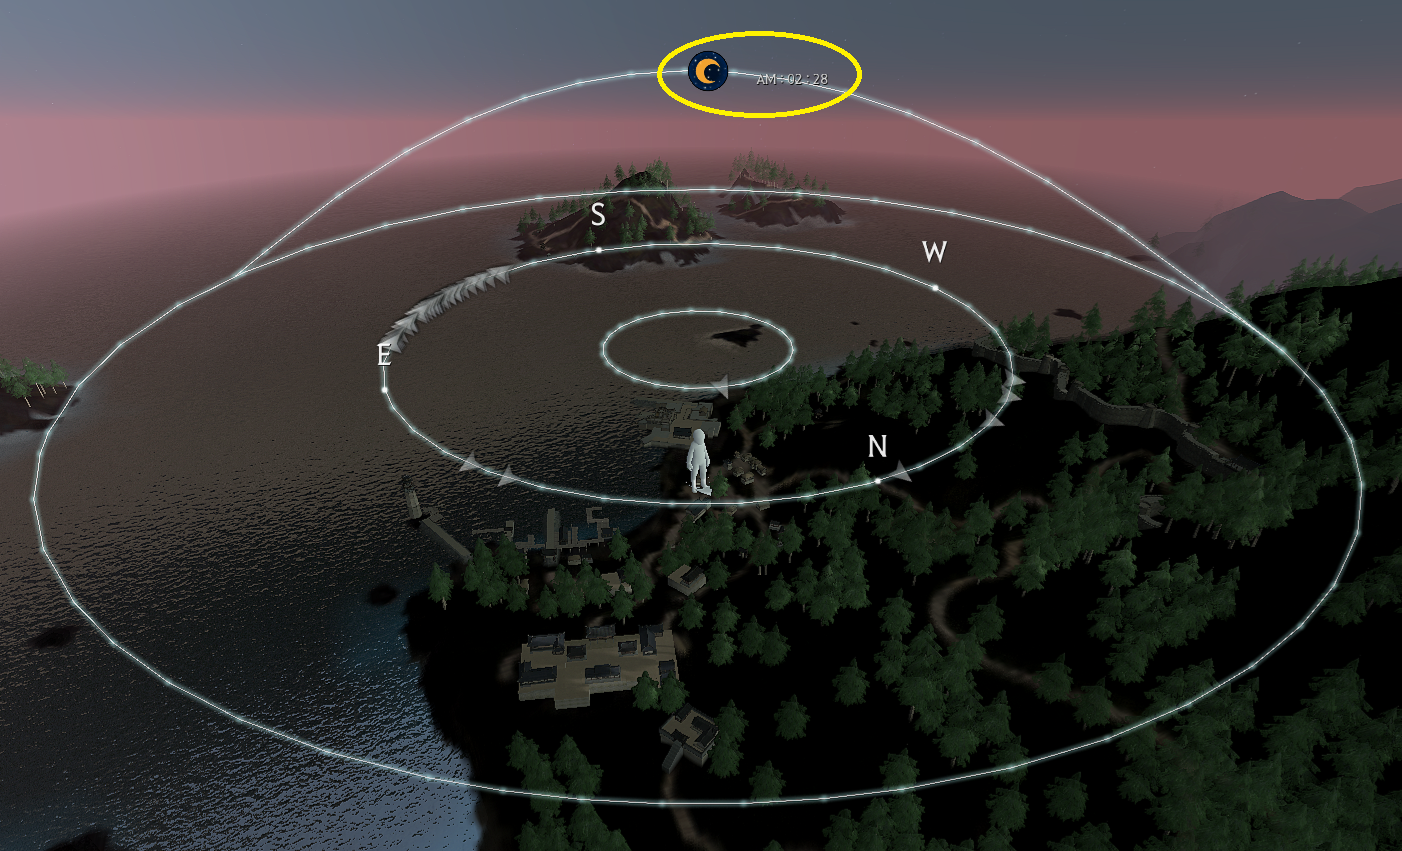
▲ 02:28 am. Night time

▲ The heavy rain in the middle of the sea. If you go there, rain is actually pouring.
You can see a circle drawn around the position where you stand on the world map. Along this circle, the white translucent arrows are marked. Place your mouse on the arrows to check the name of a central village or a town.
The arrow marked on the smallest circle represents a town near where the character stands, and the arrow in the second largest circle represents the direction of a town of a certain distance away.
Note that this feature only displays the towns you have already found.

▲ Place your mouse on a white translucent arrow to know the direction to a town.
World Map Interface and features
• Navigation
If you right-click an icon or a node etc on the World Map, the route to the point you selected will appear. With the route activated, press Auto Run (T) to make your character automatically move until it arrives at the destination. If you want to cancel the navigation, right-click again on the World Map.

▲ If you right-click the point you want on the World Map, a light pillar appears on the target point, and a route to the point appears.
• Invest in a node and make connections
You can activate/deactivate each node shown on the World map by investing/retrieving contribution points. For more details about this contents, please refer to [Nodes] wiki page.
• Transport
Click a town node, select the warehouse menu at the bottom right, you can view the warehouses of the town. Click 'Transport' button at the bottom left of the warehouse to send the items stored in the warehouse to another town. For more details about this contents, please refer to [Warehouse] wiki page.
• Purchase a house
If you click the node icon of the town you discovered and of the farm you invested contribution points, it gets magnified and you can use the features inside the node. There are three types of house icon:
- Blue house: Available for immediate purchase.
- Gray house: Not adquired, depending the house selected it could require you to purchase the house of preceding address since sometimes they have a specific order to be adquired.
- White house with an icon on the right: means that you have already purchased the house and have a specific service assigned to it.
(Check the image below, each one has been marked with the same name color)
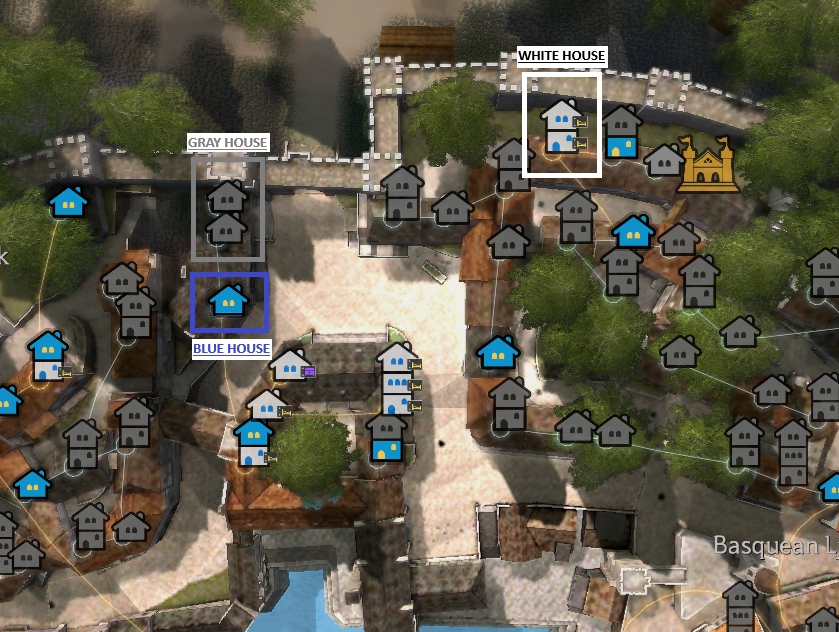
Have in mind that you need to consume contribution points to purchase a house, but you can also sell the house to take back the contribution points if needed at any time. For more details about this contents, please refer to [Houses] wiki page.
• Manage Production/Worker
If you have a production node that you made investment, you can send workers to make production then the produce will be stored in the town warehouse. Workers consume Worker Stamina every time they work. A worker who is exhausted of Worker Stamina can no longer work, so you must fire the worker or restore Worker Stamina. For more details about this contents, please refer to [Workers] wiki page.
Top Left Menu UI
• Search filter: You can use this search filter (left image down below) to easily find specific nodes, locations, or services. For instance, typing "stable" will display every discovered Stable Keeper nearby. Left-clicking (LMB) an entry centers your camera on that NPC or location, while right-clicking (RMB) automatically creates a navigation route directly to them.
• Map filters: Filter the icons displayed on your World Map by checking or unchecking specific options (right image down below). Use this to easily declutter your view if the map feels overwhelmed with information.
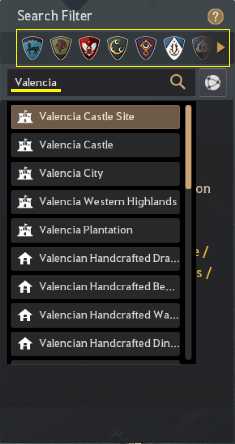
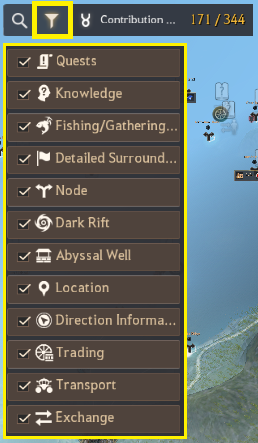
Hover over the question mark icon (?) to view additional details.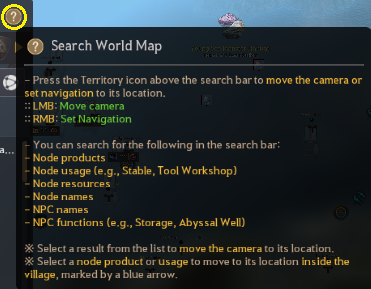
* Tip: For easier navigation without unnecessary dragging or scrolling, you can snap your camera directly to any regional Stable Keeper by left-clicking (LMB) the region banners marked in yellow that are shown in the image below.
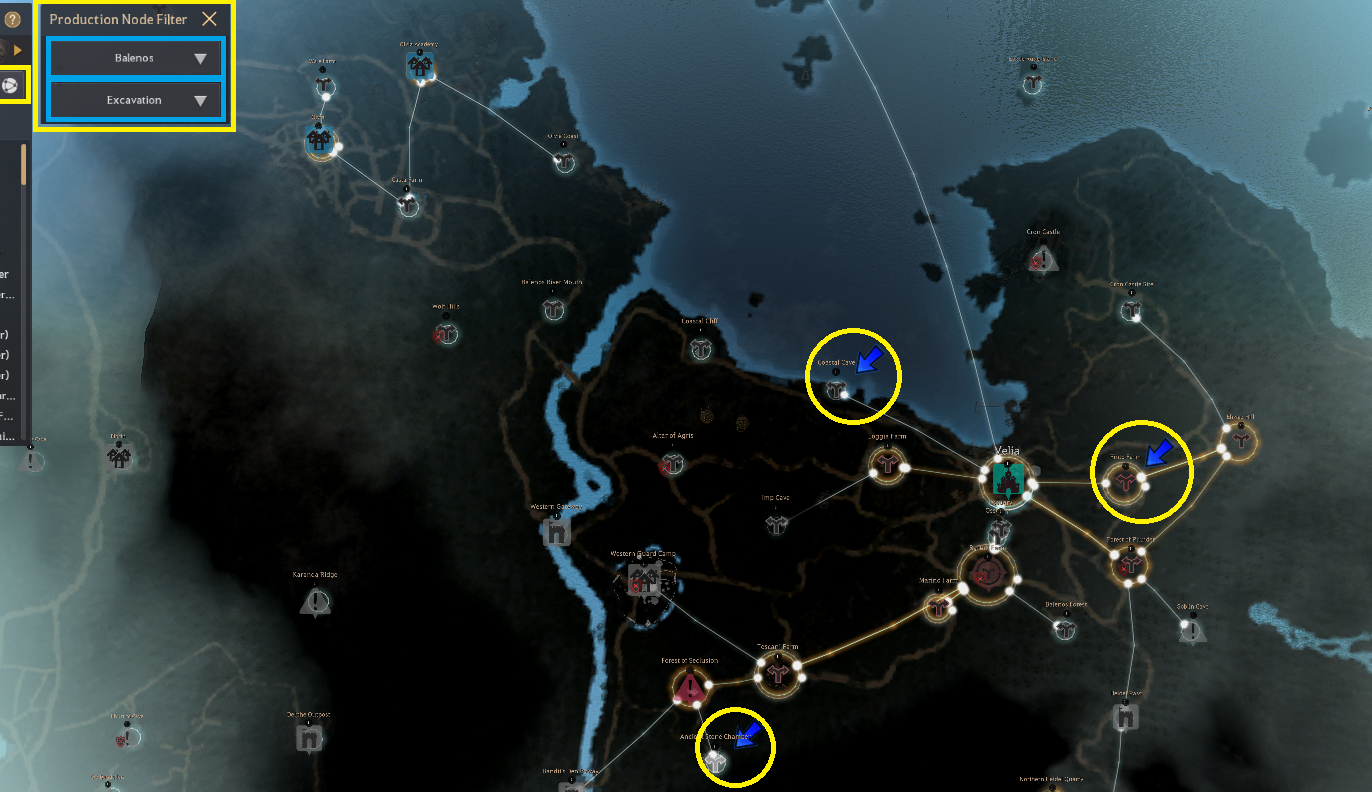
• Node list overview: Use this feature to quickly highlight nodes that yield specific resources. Simply choose a region and a production type from the dropdown menus (highlighted in blue in the image below), and arrows will appear pointing directly to the nodes matching your selection.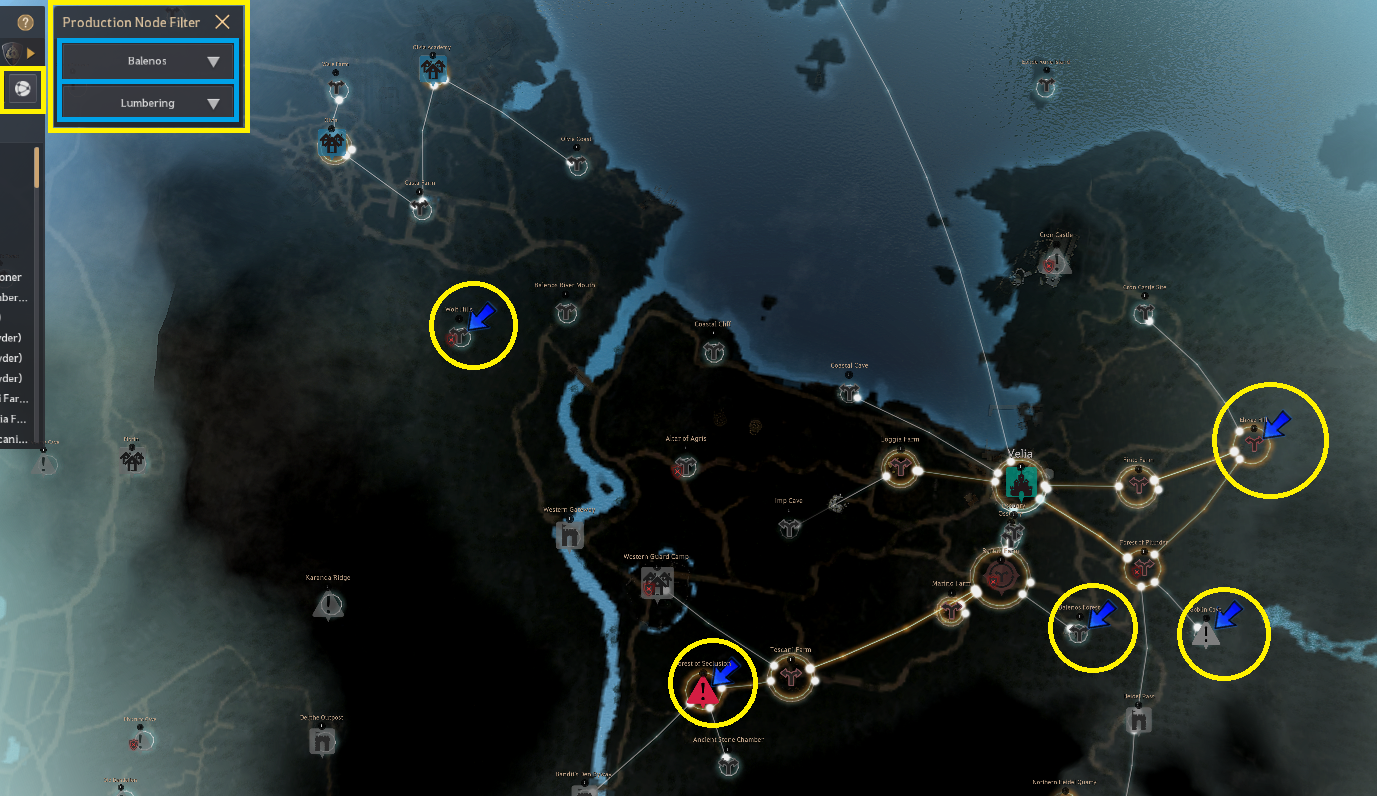
• Contribution points: this will show you the maximum contribution points and available contribution points in your family. You can increase it by exploring the world or doing certain activities. More information can be found in our [Contribution] wiki page.
Now lets go through some other functions that your world map offers and explain them one by one, from left to right we have:
World Map Snapshots - Connect Node Directly - Navigation Settings - Retrieve Loop - Quest - Barter Information - Find NPC - Horse Market - Stable - Transport - Central Market - Worker List - Map Guild Strategy.
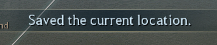
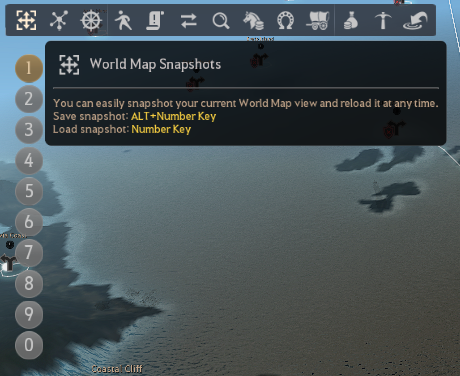
• World Map Snapshots: Use this feature to save map camera bookmarks using hotkeys. Simply position your map camera over any location or node you want to save (for this example we will use slot 1) and press Alt + 1. A confirmation message will pop up once the location is saved. Afterward, just press 1 while the map is open to instantly jump to that exact view. To overwrite a saved location, press Alt + [0–9] on the slot you want to update.
• Connect Node Directly: This feature lets you preview the exact Contribution Points (CP) and Energy required to connect two nodes. For example, to connect Shakatu to Gahaz Bandits' Lair, open the feature and select Shakatu as your starting node and Gahaz Bandits' Lair as your destination. If you meet all CP and Energy requirements, click "Connect Node" to link them automatically. The window will also display details such as the total number of nodes selected and whether the connection is currently available or not.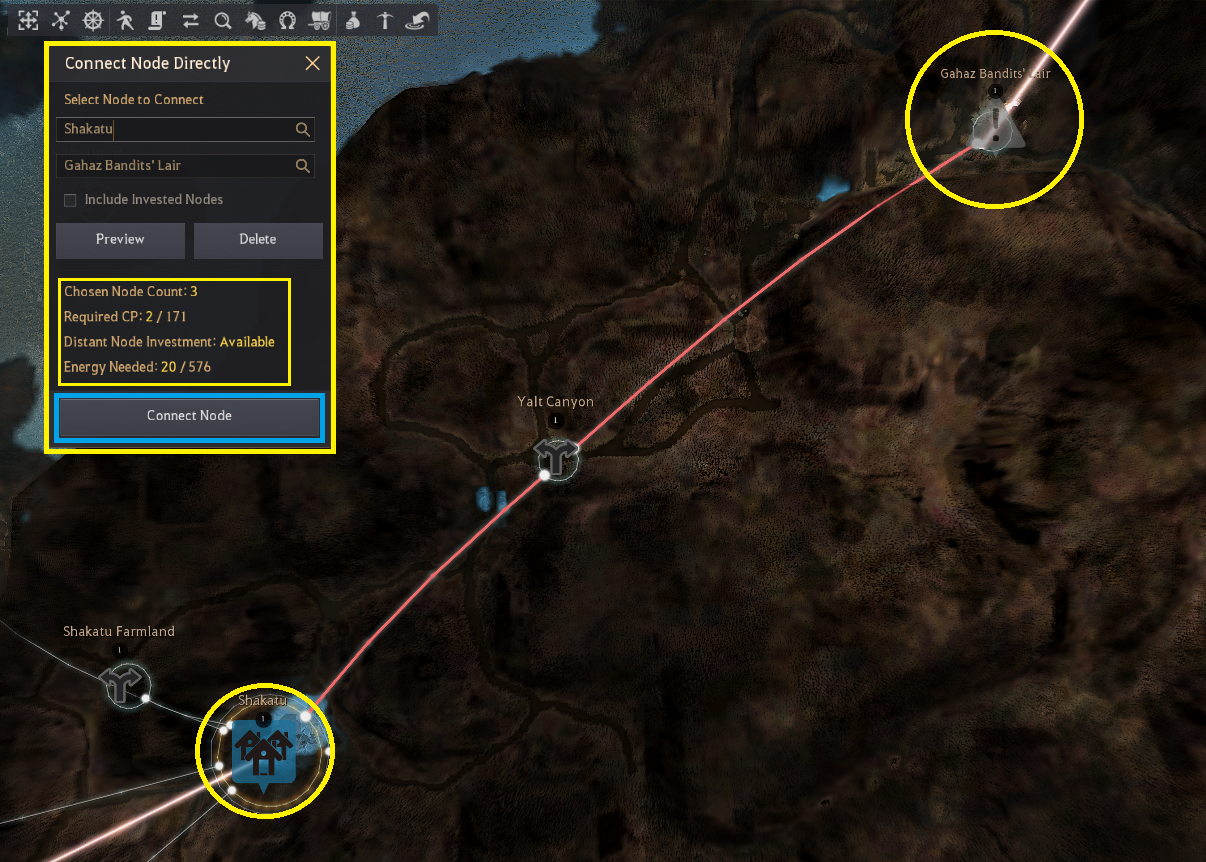
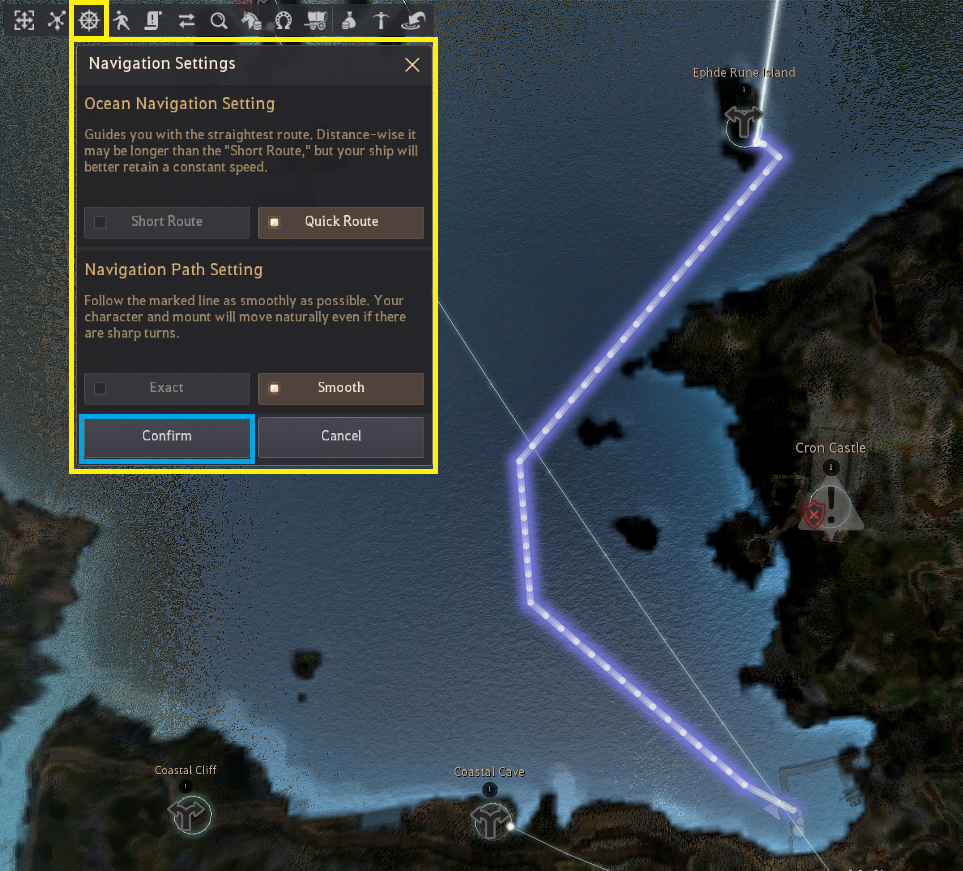
• Navigation Settings: This feature optimizes your ocean autopathing for smoother sailing. As shown in the images below, adjusting your Ocean Navigation Setting allows the map to calculate shorter, more direct routes by cutting sharp turns. Meanwhile, tweaking the Navigation Path Setting determines how strictly your vessel follows the route—either maintaining exact precision or taking smoother arcs. Feel free to experiment with these settings to match your preferred navigation style.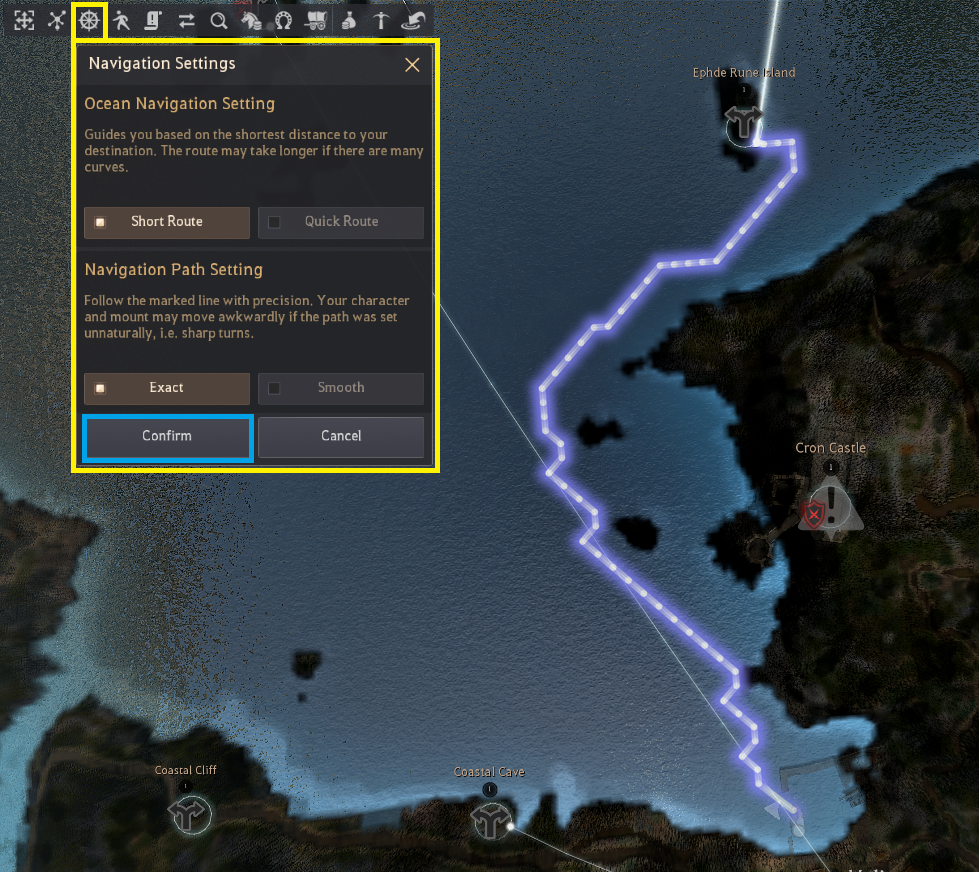
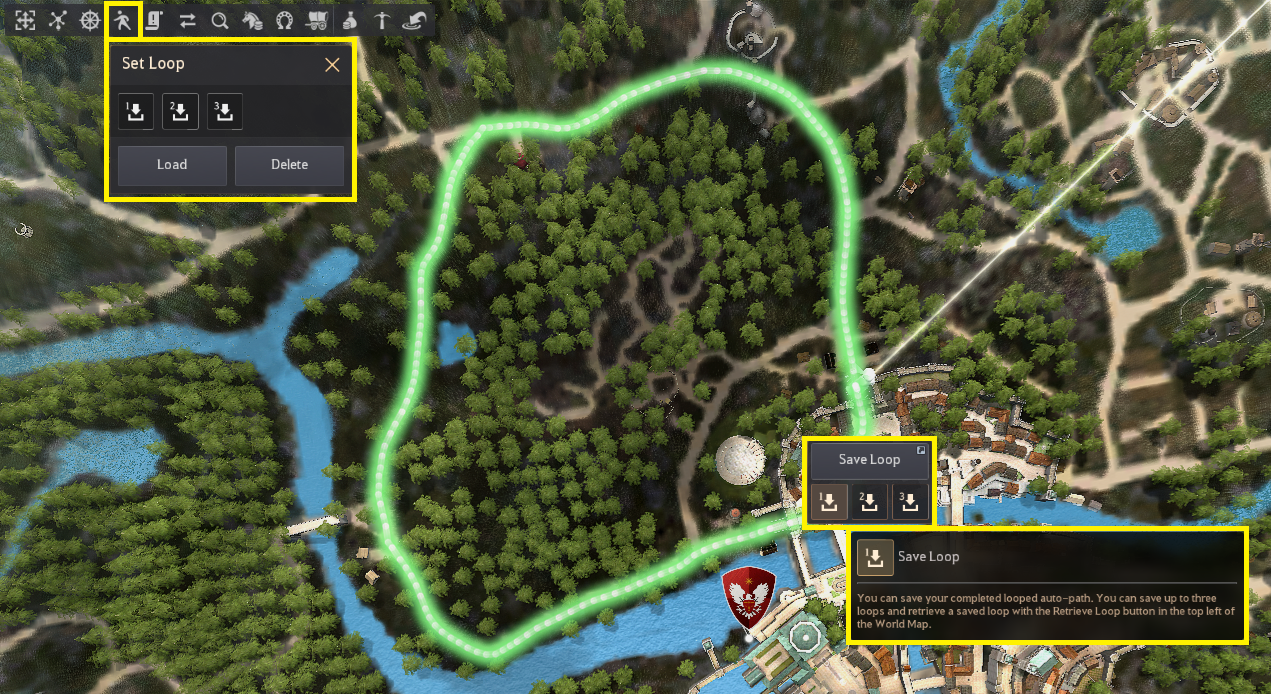
• Retrieve Loop: This feature allows you to save and load up to 3 custom autopath routes. Open your map (M) and right-click (RMB) to set your initial destination. To add more waypoints, hold ALT and right-click anywhere else on the map to build your preferred route or closed loop. Once configured, simply assign it to one of the 3 available slots to save it for later use.
• Quest: This feature allows you to view your active quest log while your map is open, making it easier than ever to plan your next journey.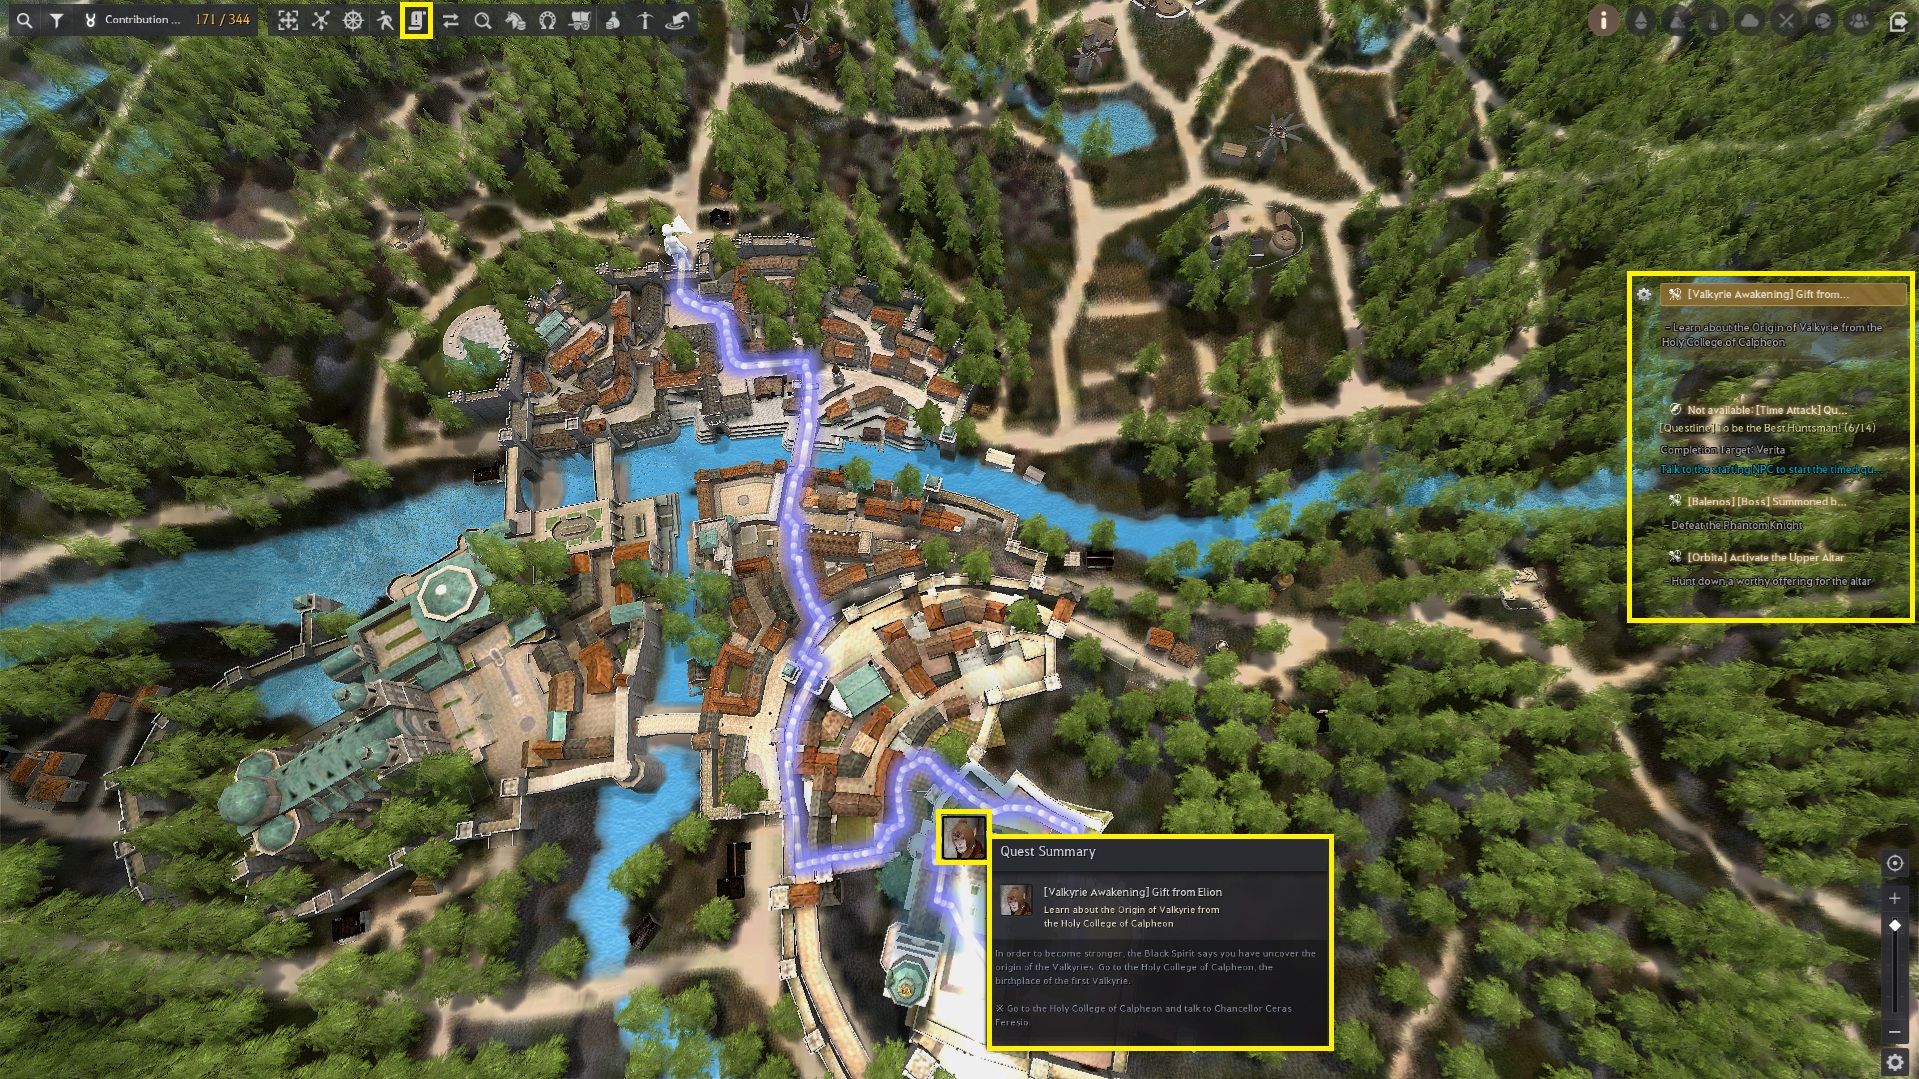
• Quest: Access your Barter Information window directly from the map screen for easier route and trade planning. You can see more details about bartering in our [Sailing & Bartering] wiki page.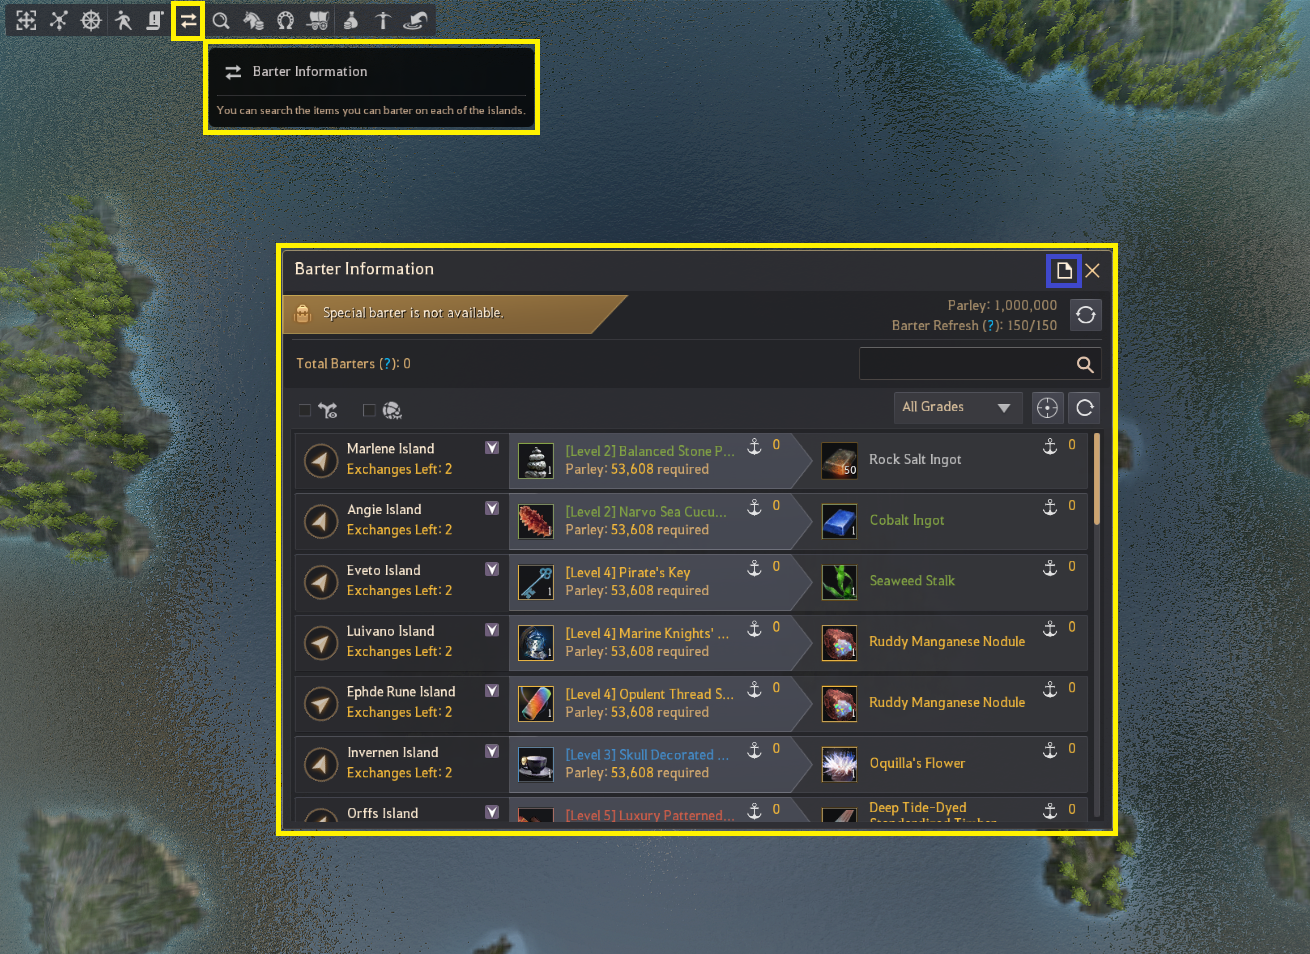
* Tip: As highlighted in blue in the image, the Barter Information panel features a pop-out button. Clicking this icon detaches the window from the game client, allowing you to drag it onto a secondary monitor and making route planning much more convenient for multi-screen setups.
• Find NPC: Click this button to access the ¨Find NPCs¨ function while having your map opened. This window allows you to search any NPC known in the world of Black Desert.
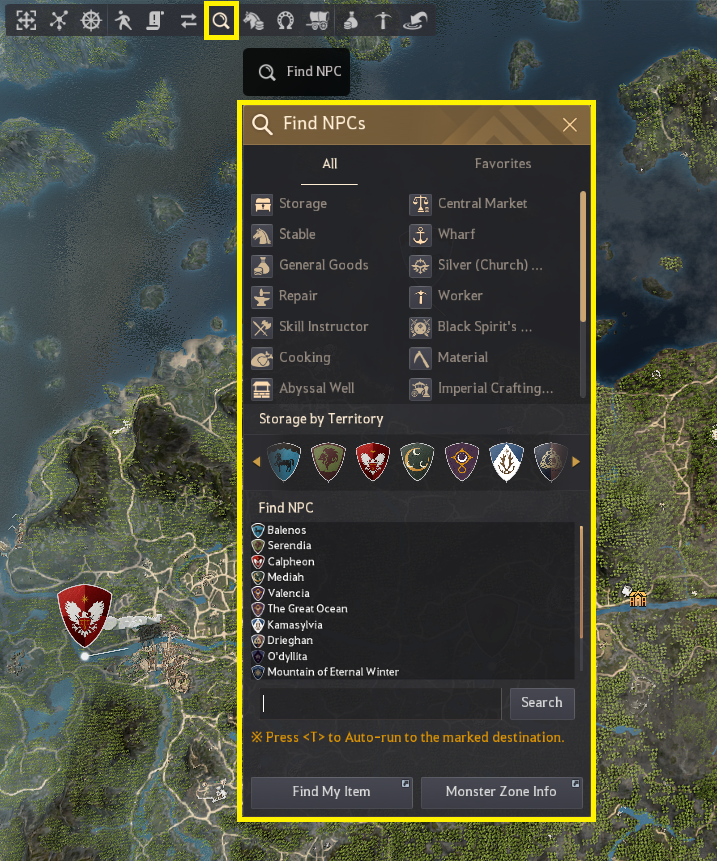
• Horse Market: Click this button to open the Horse Market panel while viewing the world map.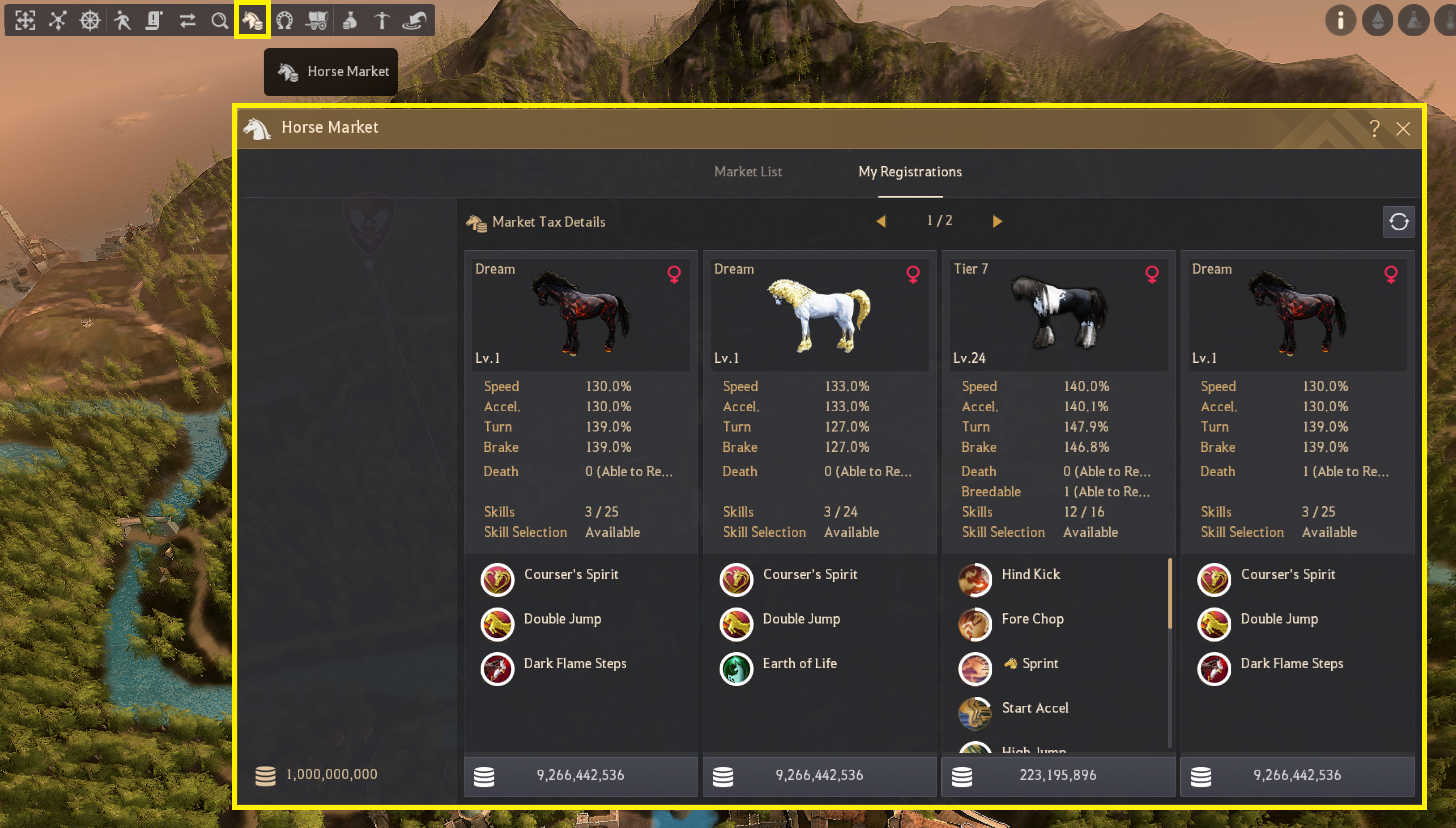
• Stable: Click this button to open the list of all your horse stables from any town while viewing the world map.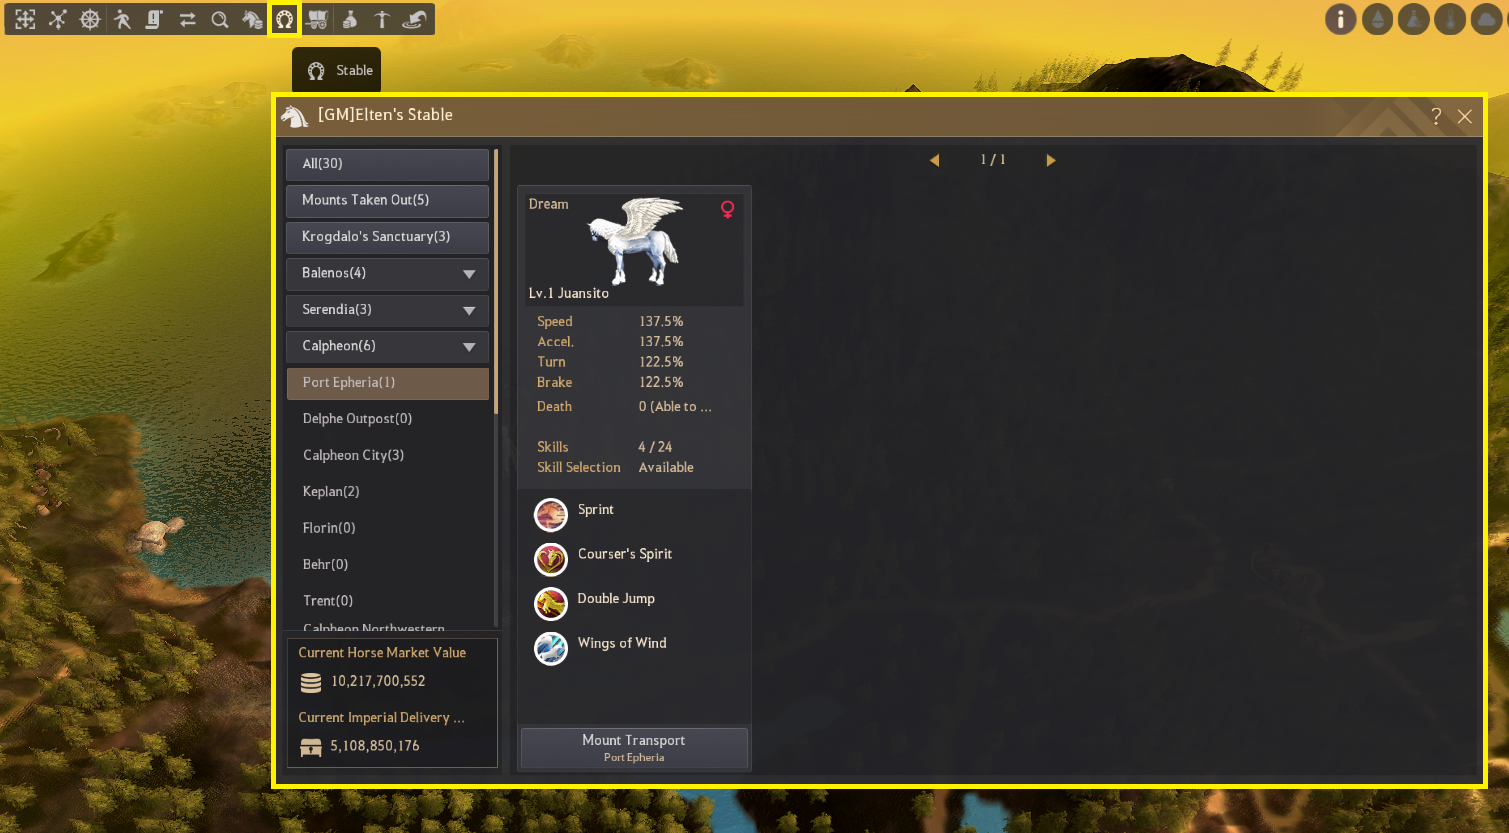
• Transport: Click this button to open your ¨Transport List¨ and monitor the status of all active transports.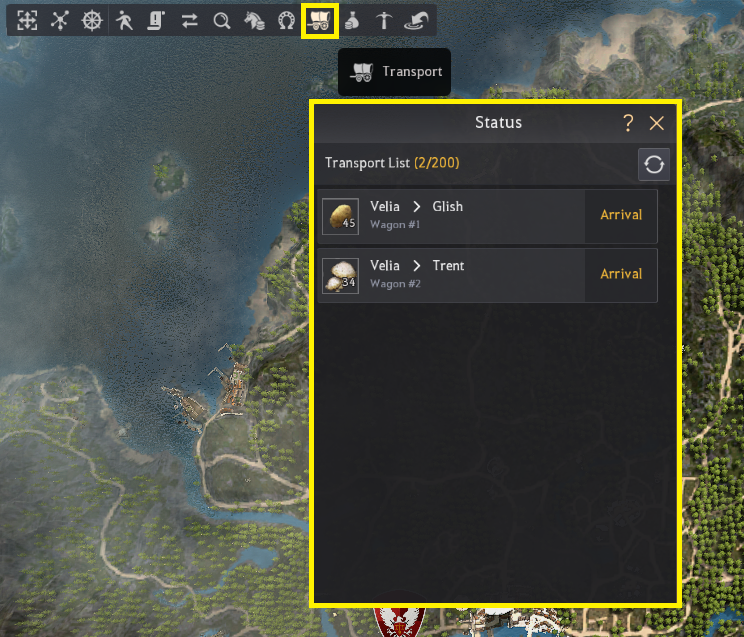
• Central Market: Click this button to open the ¨Central Market¨ while viewing the world map.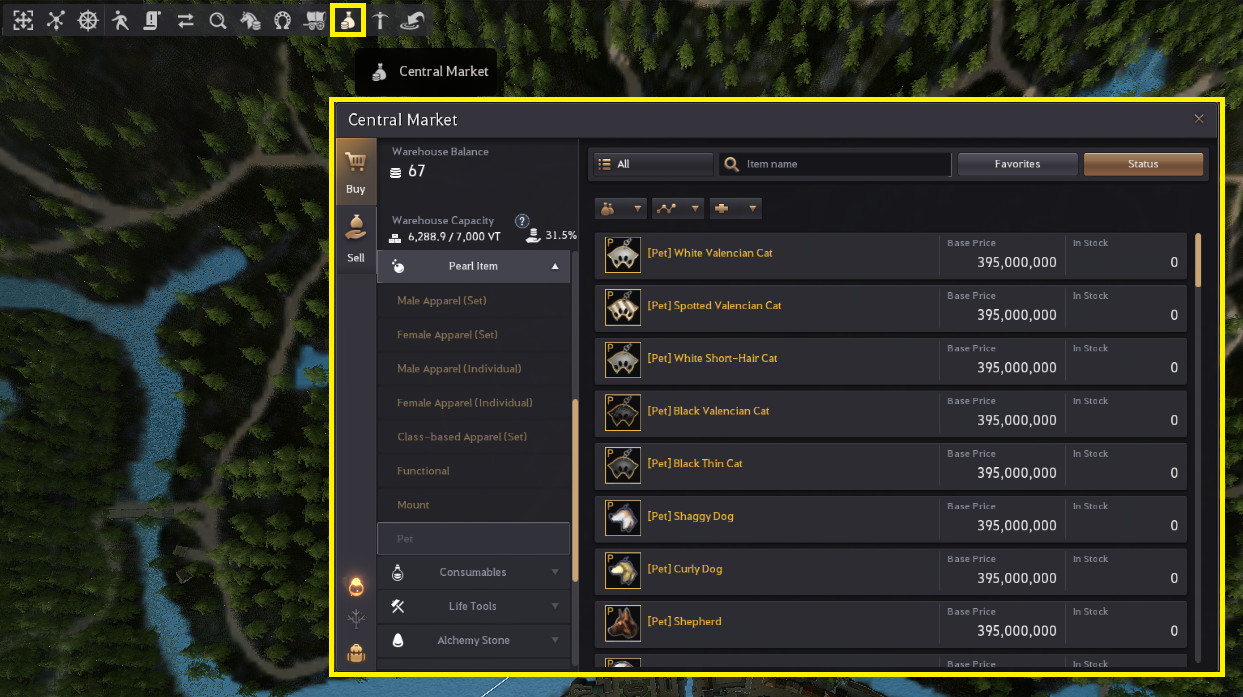
• Worker List: Click this button to open your ¨Worker List¨ while viewing the world map.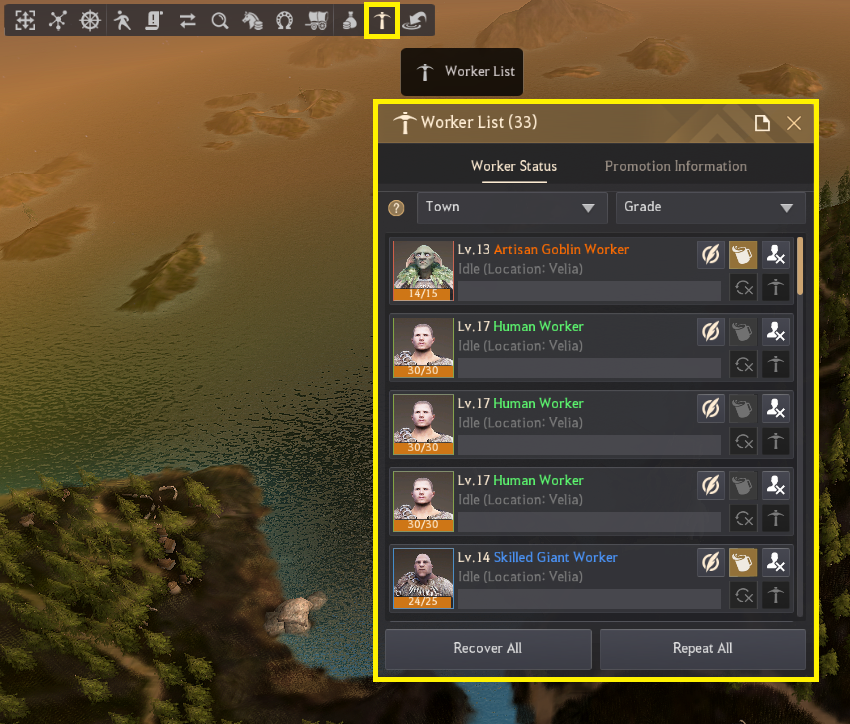
• Map Guild Strategy: Use the ¨Map Guild Strategy¨ to plan your tactics ahead of Node and Siege Wars. You can easily mark the map with customized shapes and colors to designate initial objectives, positions, or movement routes. Sharing these visual plans with your guild improves team coordination ensuring everyone is organized and ready to adapt as the battlefield evolves. Using Map Guild Strategy requires the Map Guild Strategy authority. Guild members without authority can only view existing mappings. Here you can see more details about this system.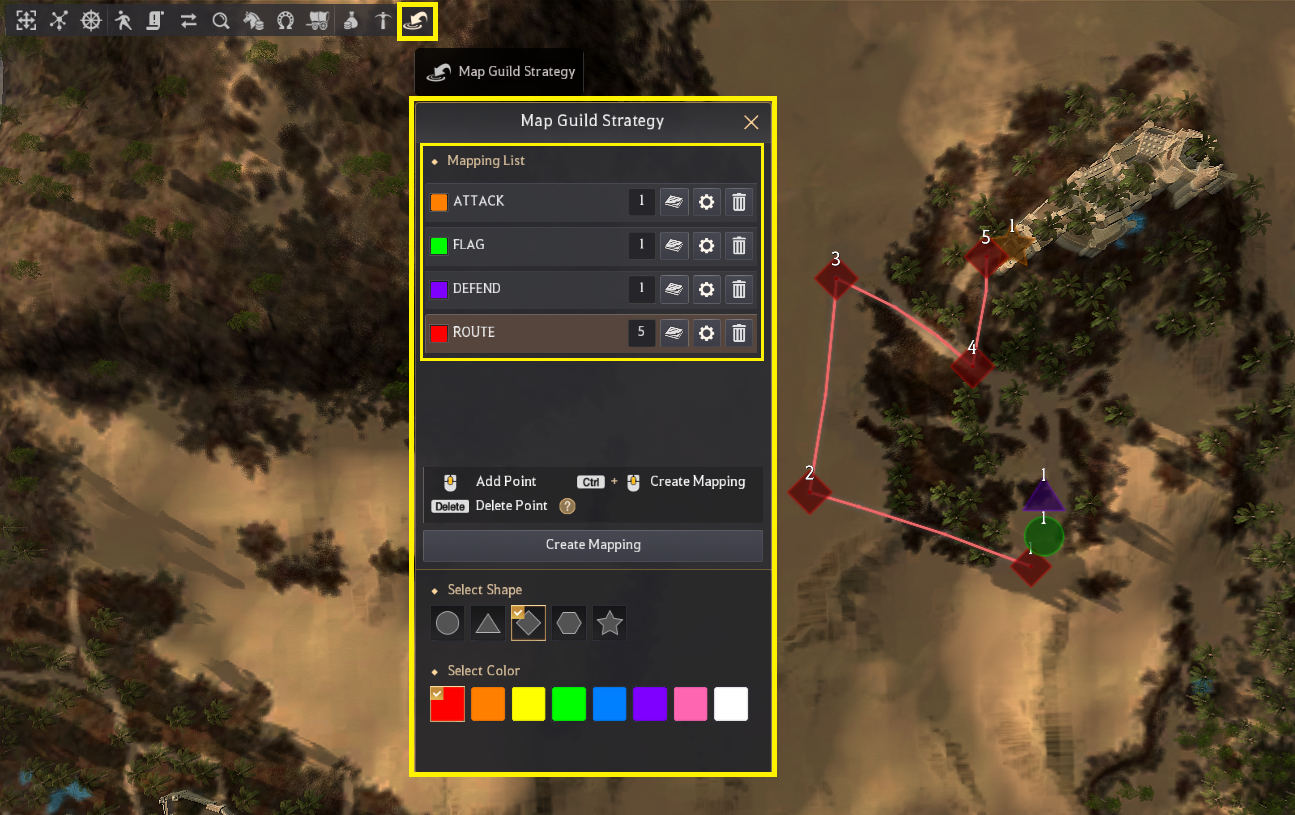
Top Right Menu UI
The nine icons located at the top right of the World Map provide essential information to help you navigate Black Desert. Let's take a closer look at what each feature offers.
• General Information: This filter basically shows you the general information about discovered areas, nodes and quests. Is the filter set by default.
• Groundwater Information: Displays the range of water deposits in the ground. Rainy areas feature expanded groundwater deposits. As shown on the map below, varying shades of blue indicate water levels. The darker the blue, the higher the moisture. Placing farms in these darker zones ensures higher humidity levels for your crops.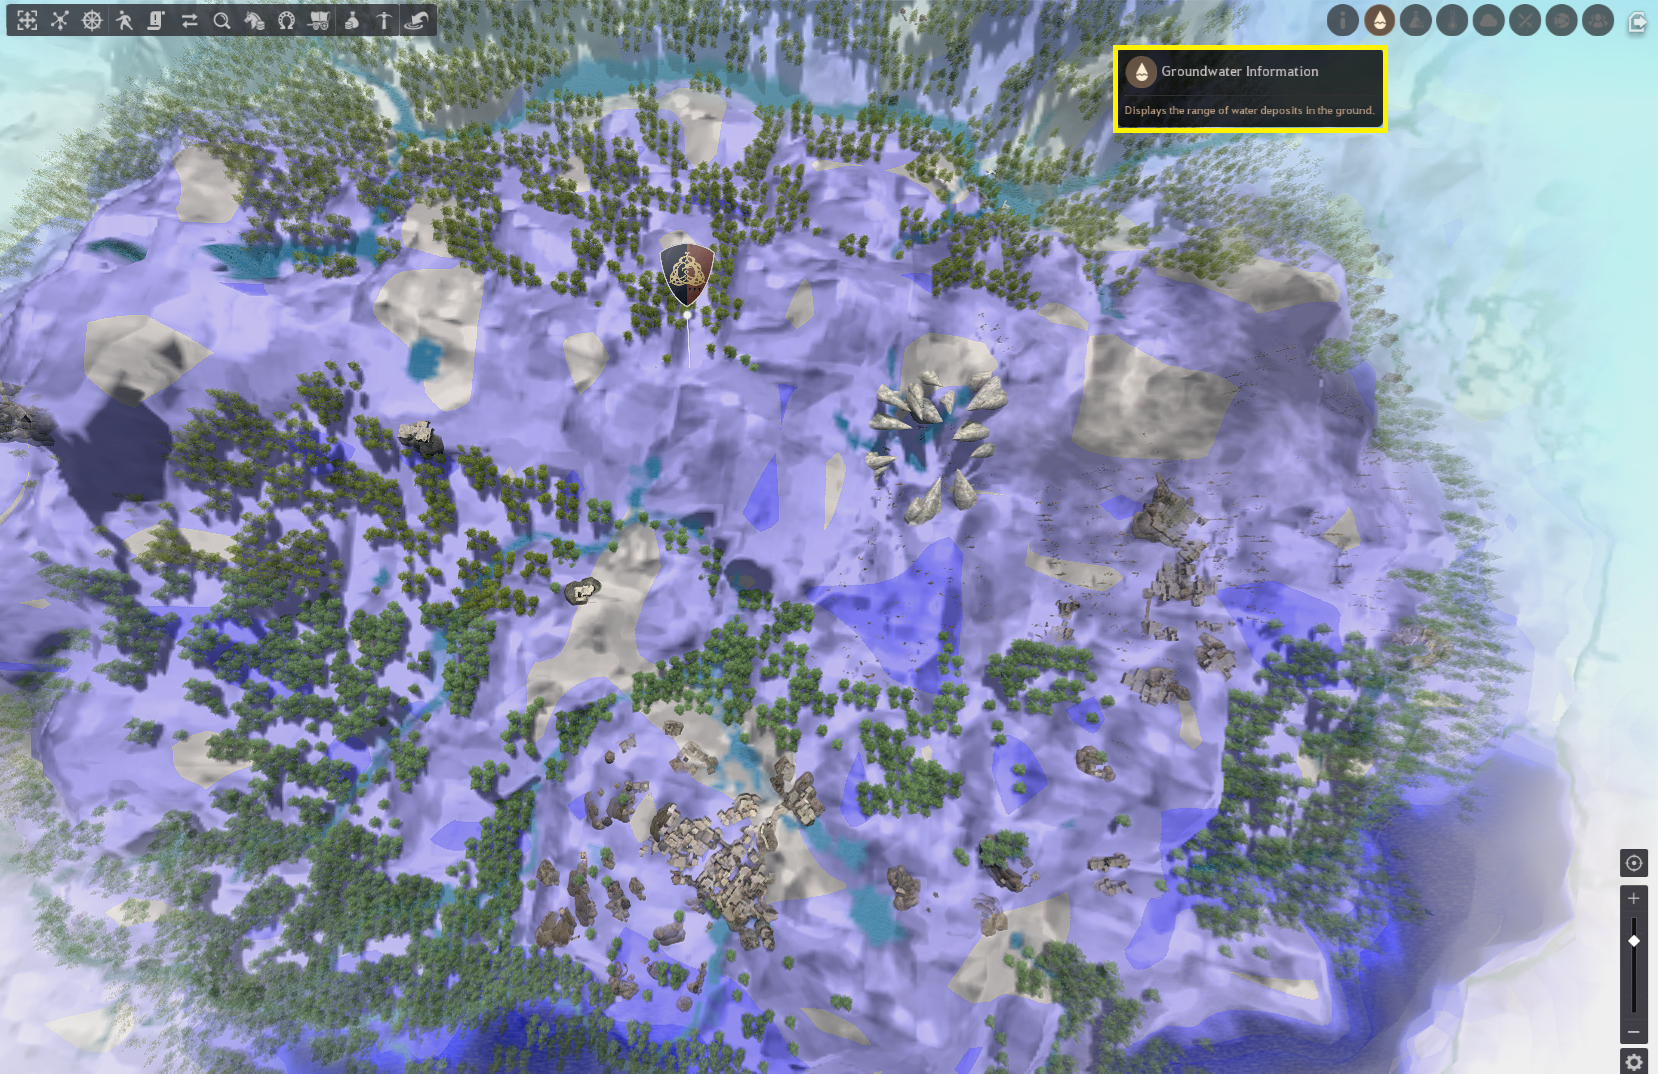
• Territory Resource Information: Displays territorial resources and public opinion in bar graphs. When it comes to resources, the blue bar shows the fish available in that area, at 100%, fish resources will show as abundant and will eventually become exhausted as they drop toward 0%. The lower the resources, the longer it takes to fish.
The green bar shows the resources available to be gathered by workers, and just like with fish resources, the lower it gets, the more time will be required to complete an entire worker process. Percentages are channel/server-based, which means you will find different numbers depending on the channel you are on.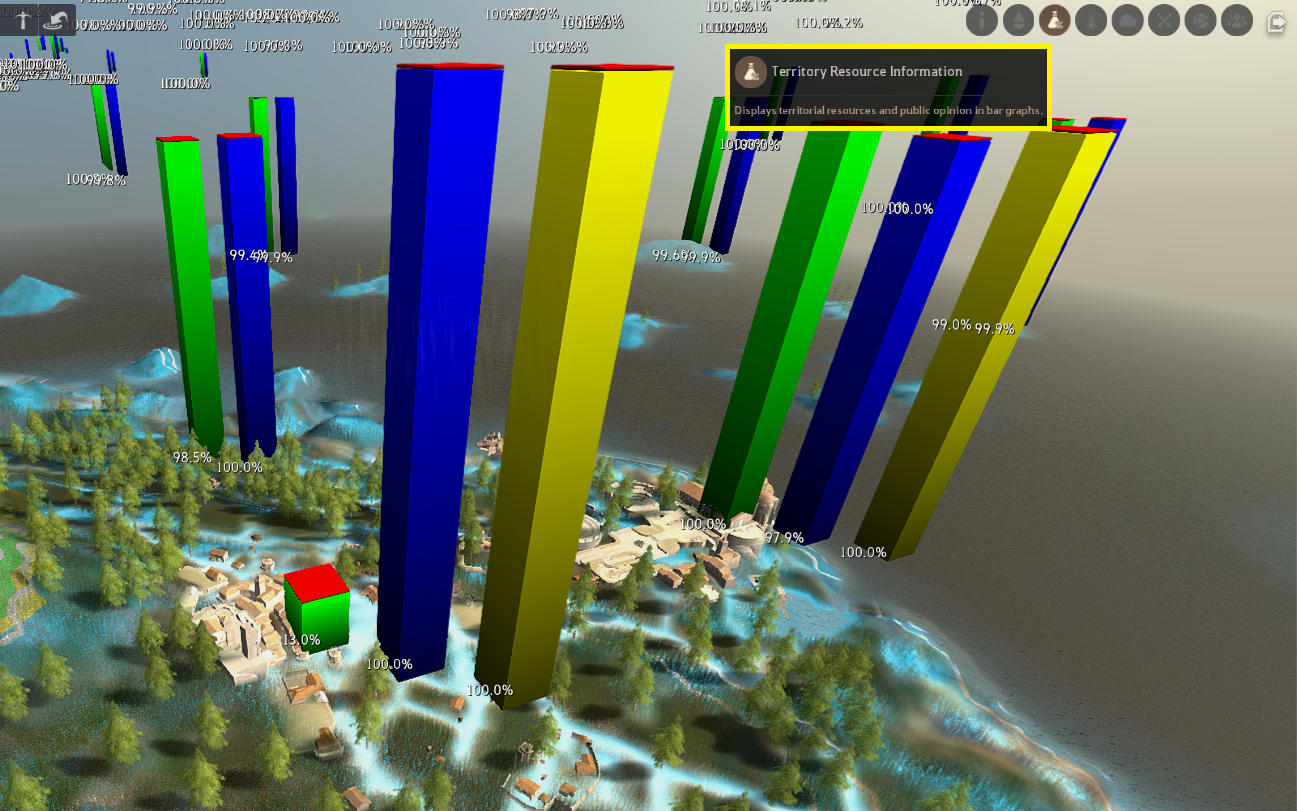
• Temperature Information: Displays the temperature difference between regions. Temperature, along with groundwater, affects crop growth.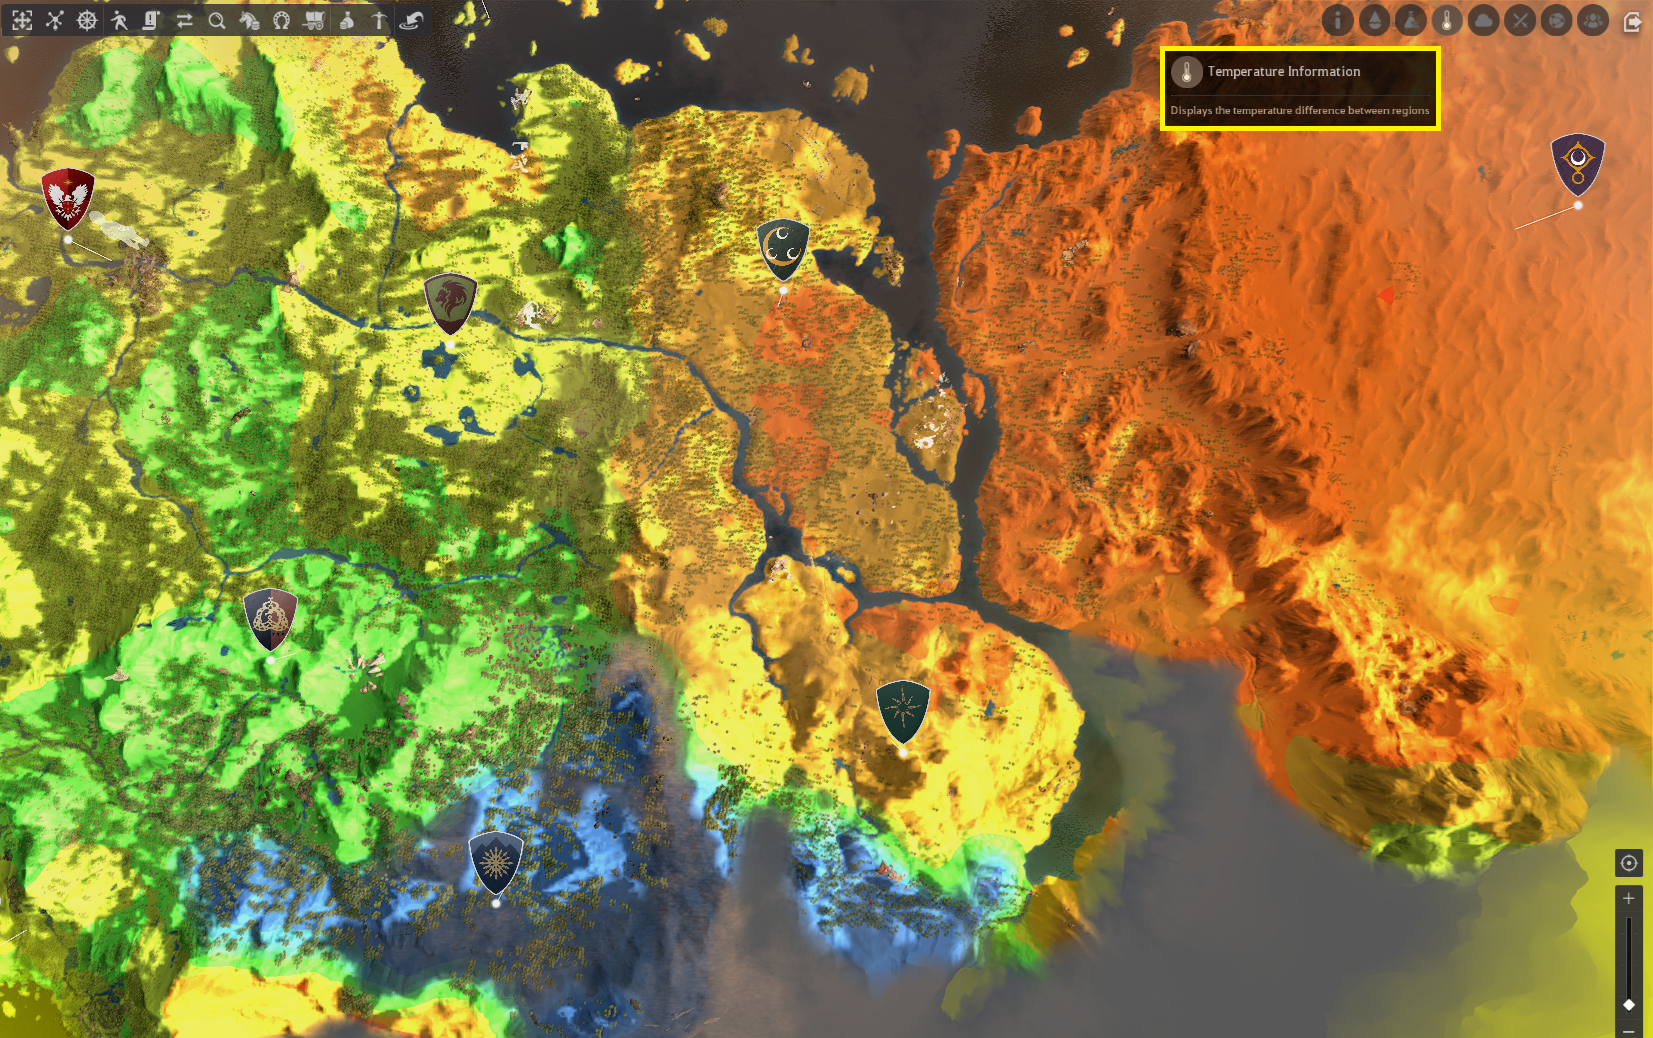
• Humidity information: Displays the humidity of each region. If the temperature and humidity reach the level of certain conditions, it rains.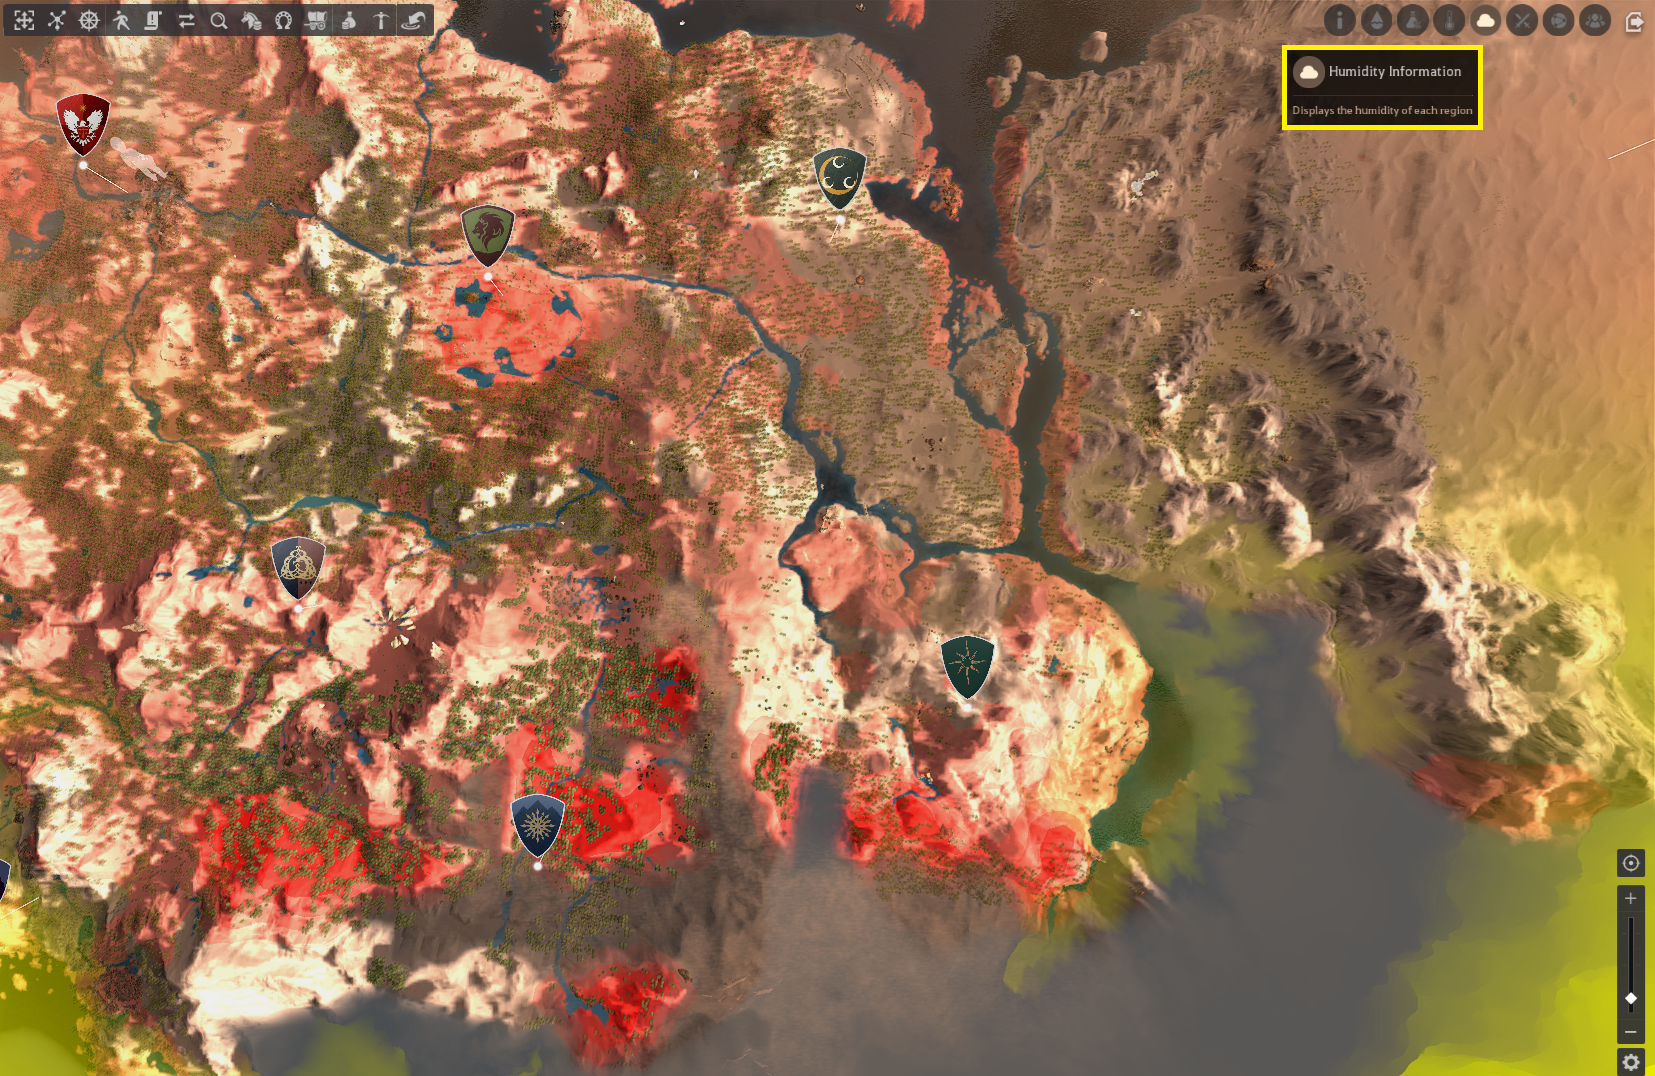
• Node War Information: Displays information about the Node War and Blue Battlefield occupation status for nodes where available. You can hover over each node to see more details, such as schedule, max participant limits, and stat caps. Clicking on each game mode name will redirect you to its specific wiki page to learn more.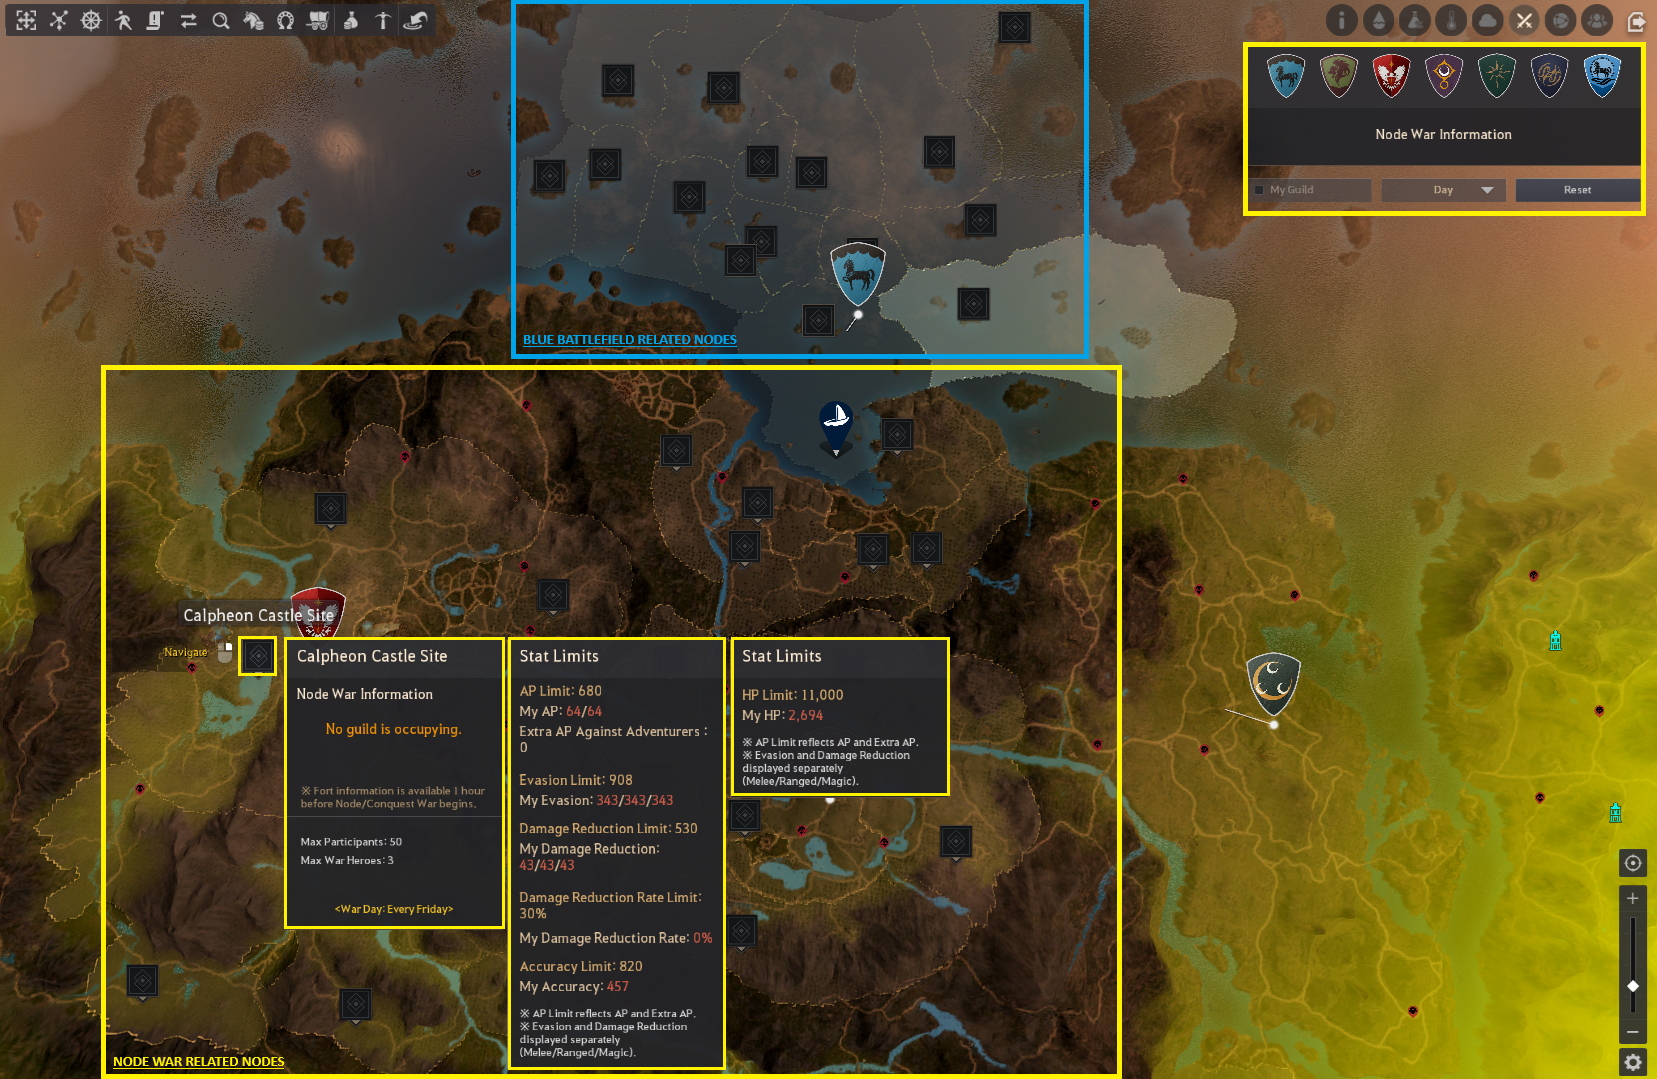
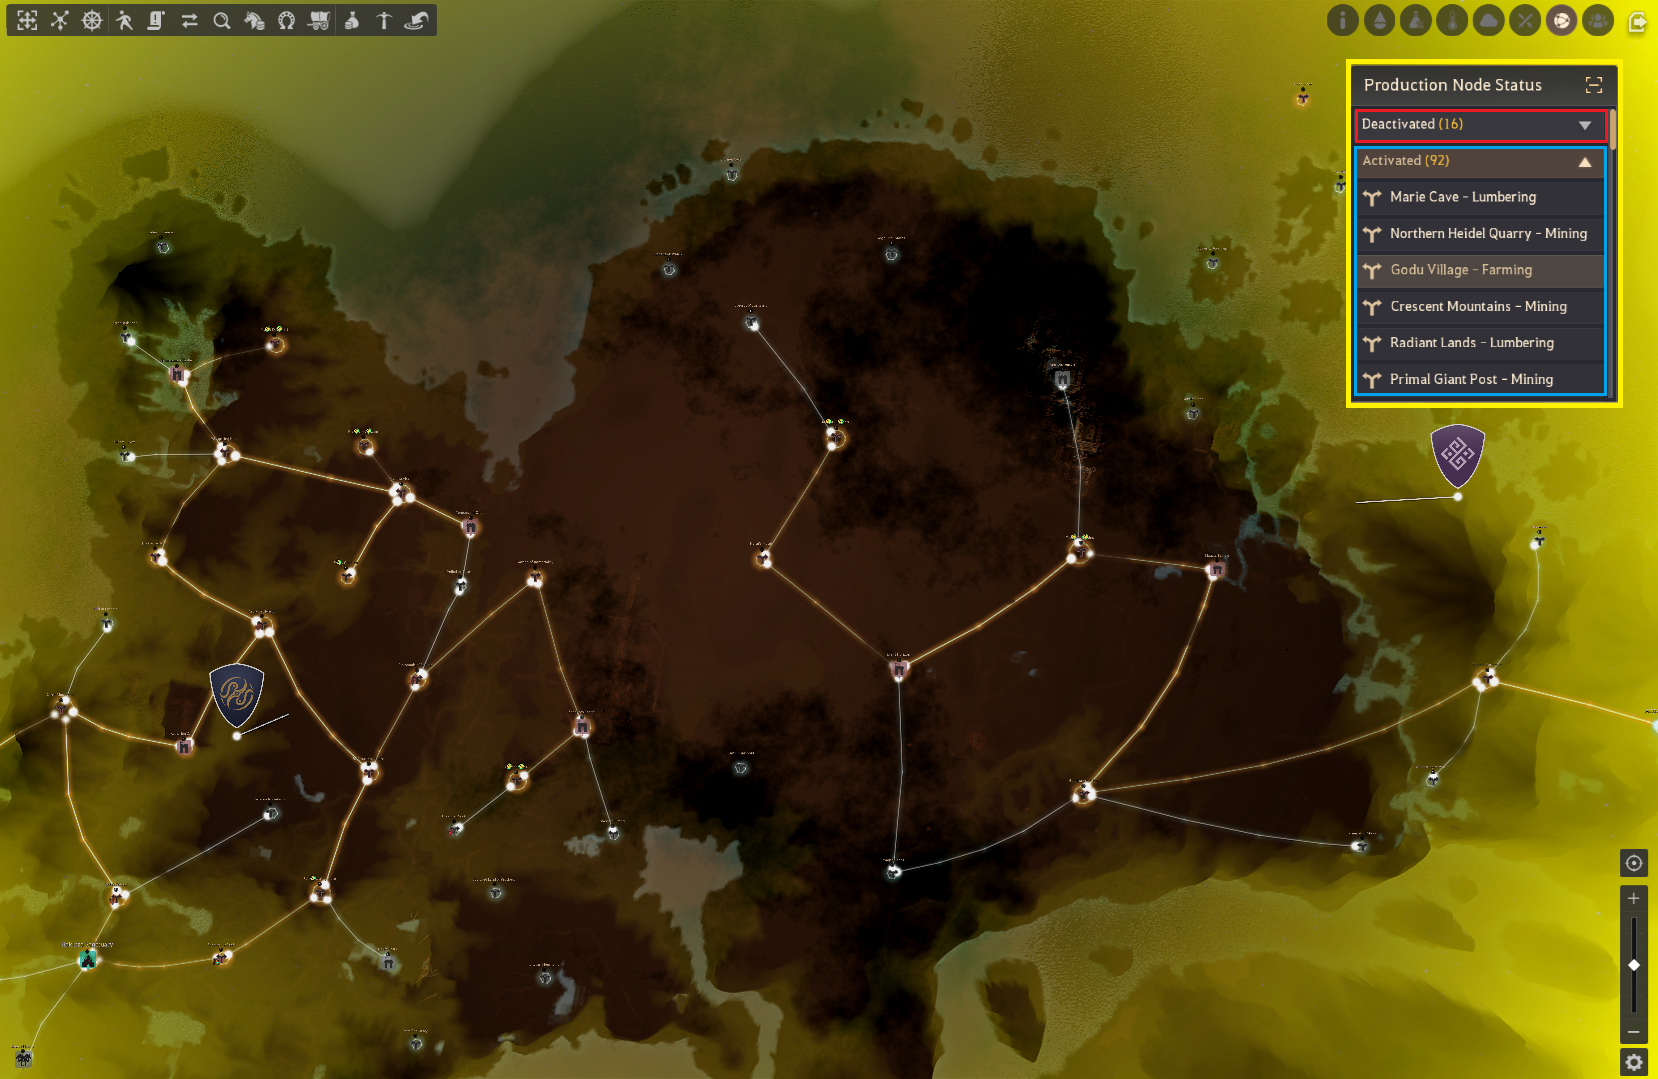
• Production Node Information: This filter allows you to easily check the status of your activated and deactivated production nodes. From the small menu in the top-right corner, you can easily navigate between them without having to scroll or drag your map. Just open the "Deactivated" or "Activated" list and select any node and your camera will move directly to it.
• View Family Characters: Press the "View Family Characters" button on the World Map to see all characters in your Family at a glance. With this function you can instantly see where your characters are on the World Map, move them around, retrieve items, or even leave notes to help you keep track of important details. You can see more details about this function in the respective history update.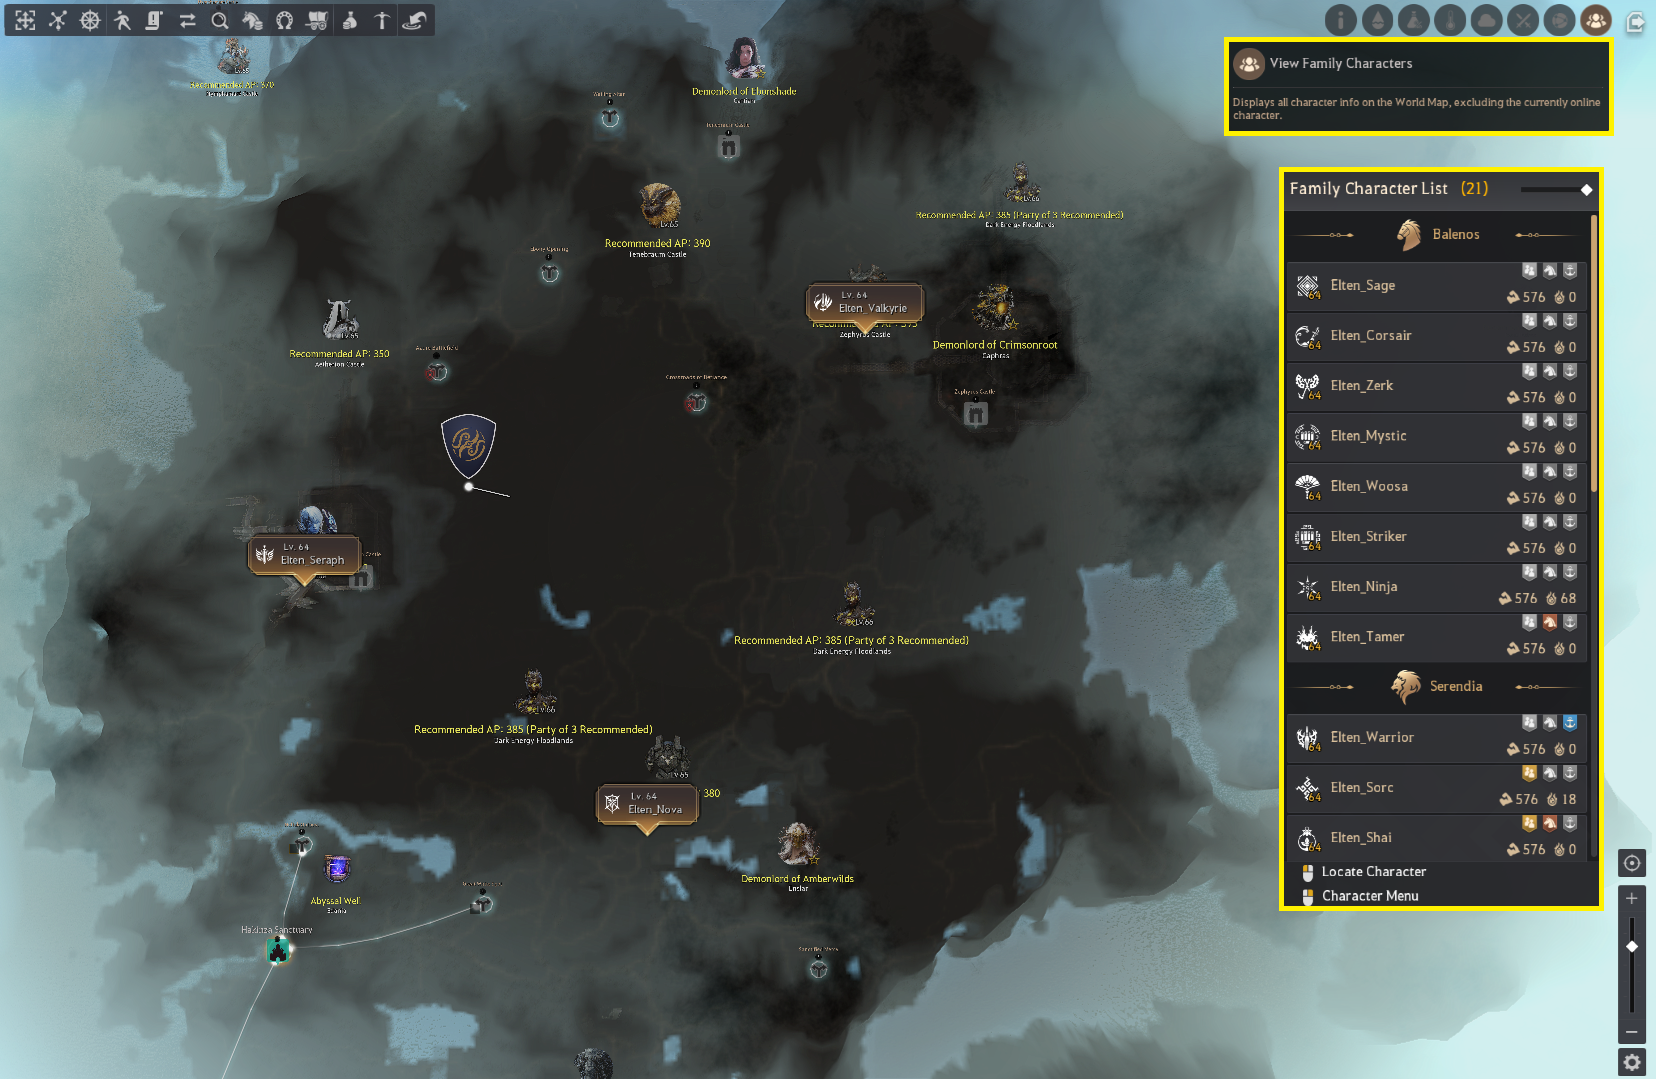
* The content of the game guide may differ from the actual game content, depending on the update and content changes.