Inventory
Last Edited on : Jul 29, 2025, 15:46 (UTC)
The most basic thing to sustain oneself during an adventure is their inventory. Here, sustainability refers to how long specific actions can be carried out without the need to go back to a town.
For example, in PvE, as the number of inventory slots in which you can put your items increases, you will be able to hunt for a longer time.
Black Desert initially offers 16 inventory slots for all created characters, and you can increase them up to 192 slots per character.
There are also 192 pearl inventory slots to store your pearl items separately.
Inventory slots are obtained as you complete certain quests. Many of them are main quests, while some are side quests found in towns.
If you are wondering what quests reward you with inventory slots, please open the Quest window (hotkey: O) and check the Suggested tab. There you will find the "[ADV Support] Inventory Expansion!" quests.
Newbie Inventory
When you check the Inventory (hotkey: I) window, the Newbie Inventory button will open automatically as well.
This inventory, visible only to new Adventurers, has no weight limit and is meant to serve as an extra helping hand during one's first weeks in the world of Black Desert.
Click the move button at the bottom and right click the item you want to store or retrieve.
After the period of new Adventurer benefits ends, you can no longer store items in the newbie inventory, but can retrieve the items you stored there at any time.
Please note that trial characters cannot use the newbie inventory, and that certain items, such as quest items, junk items, character-bound items, contribution items, trade goods, mount emblems, and guild-related items, cannot be placed in this temporary inventory.
Storage and Mount Inventory
There is a storage warehouse facility available exclusively in all cities and some towns. To use it, simply interact with the Storage Keeper NPC of the settlement.
At first, you will only be able to use 8 storage slots, but they can be increased by purchasing houses in every town and using them for storage.
Like with the inventory, you can have up to 192 storage slots per town.
The inventory of mounts, such as donkeys, horses, elephants, wagons, and ships, has a different number of slots available, depending on the type of mount.
Unlike a character's inventory or a town's storage, you cannot expand the number of mount inventory slots, but you can check in and store a mount with its inventory slots used in the different stables around the world. In this way, you can secure many inventory slots.
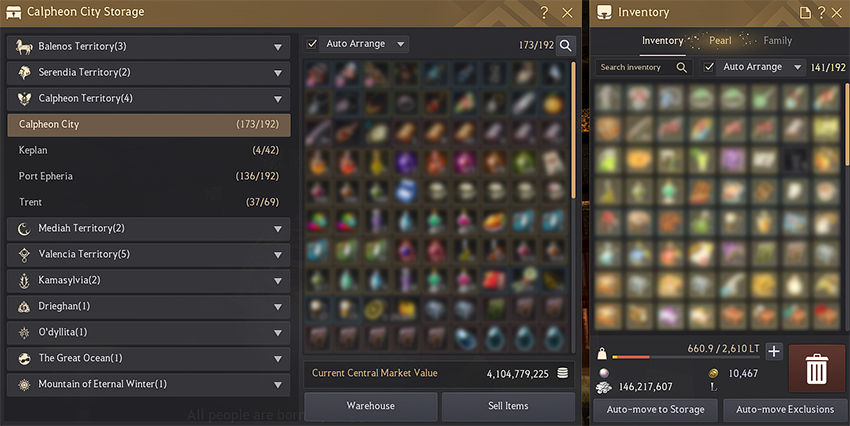
Each city and some towns offer a basic 8-slot storage facility.
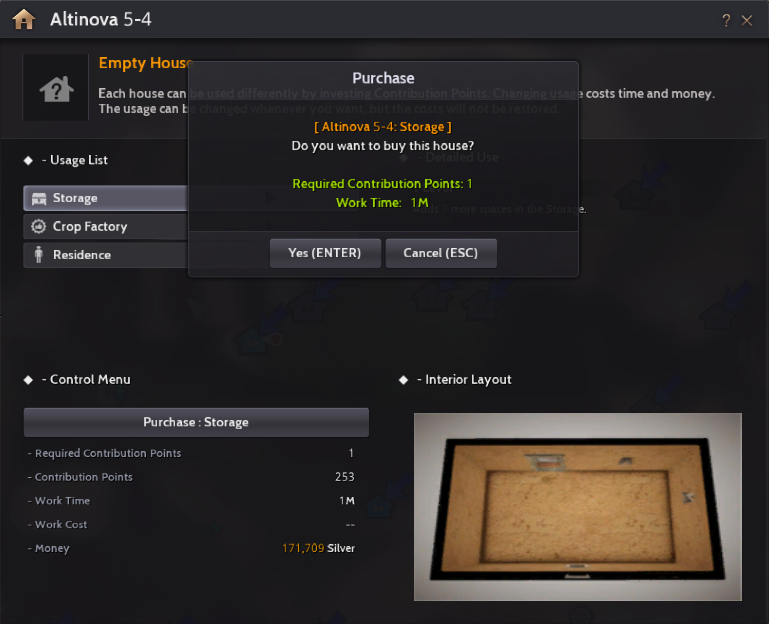
You can also increase the number of storage slots by purchasing houses and changing their purposes to Storage.
Family Inventory
The family inventory is a convenient bag that all characters in the same family have access to.
It allows you to store certain types of items that can then be accessed via the same window with all your characters.
➤ You can read more about this feature in the [Family Inventory] page.
Inventory Management
It is crucial to manage your different inventories. Unchecked inventory usage leads to confusion when you need to find a specific item.Of the different types of items, you can stack up items such as general materials, manufactured materials, and consumable items, however, you cannot do the same for items such as equipment, installable objects, and trade items.
Note that overlapping items, usually trade items, cannot be stacked up if their origin area is different.
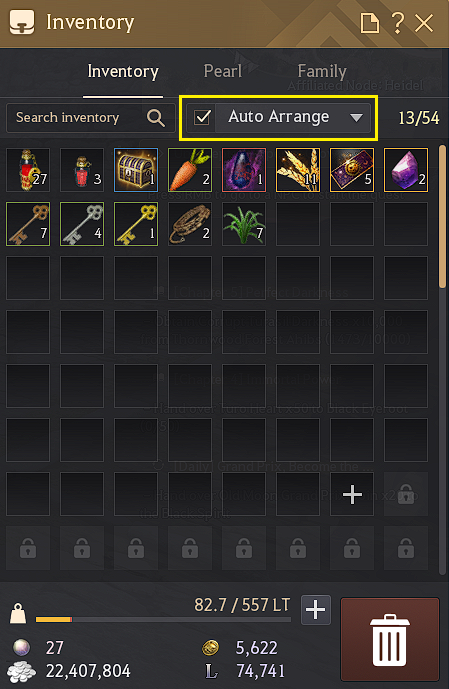
◈ Auto Arrange
If you have too many items in your inventory and find it is difficult to organize them, you can use the Auto Arrange function. If you tick this option, the inventory items will be sorted in a specific order, allowing you to better locate them.
If you instead want to keep items in a specific location of the inventory, turn off the Auto Arrange function. This way, you can change the position of items in the inventory as you desire.
Yaz's Pouch (Combinable Items)
If you have item pieces that can be converted to a new item by arranging several of them in a specific shape in your inventory, such as Ancient Relic Crystal Shards, you can combine them in Yaz's Pouch.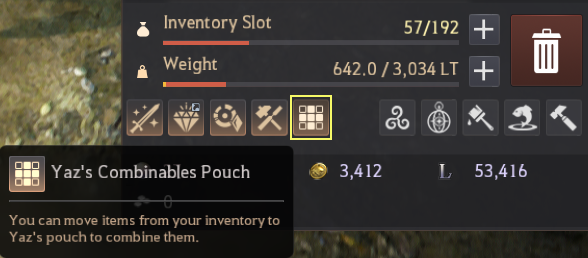
This handy pouch allows for the simultaneous combination of multiple summoning scroll materials and simplifies the process of combining items, especially amidst a variety of inventory items like those for Atoraxxion. Look for the pouch at the bottom of your inventory window.

Category Sorting
This feature, found on the top right part of the window next to the Auto Arrange button, allows Adventurers to easily view their items according to their usage.
| Before | After |
 |
 |
Inventory Weight
Even if you have empty slots available in the inventory, you may not be able to put more items in it. This is because you may have already reached the weight limit of your character.If you exceed 170% of your maximum weight capacity, you will not be able to carry additional items, even if you have the inventory slots for them.
Additionally, be careful with the weight limit, as the heavier your character becomes, the slower its movement speed and attack speed will be, which will lead you to be exposed to danger without the ability to properly defend yourself.

Please note that if the weight exceeds 170%, no more items can be obtained.
◈ Item Deletion
If you want to discard items to make the character lighter, hold click on them and drag them to the trash can icon. After confirming the deletion pop-up window, the item will disappear. Alternatively, you can also drag them out of the inventory for the same effect.
Additionally, you can first press the trash can icon, aptly named Throw Item Away, and select various items all at once to delete them.
Although a confirmation window will appear before the item disappears, be cautious not to inadvertently discard the wrong item.

In the case you have deleted a valuable item by mistake, please press the Recover button located between the Discard and Throw Away Item buttons.
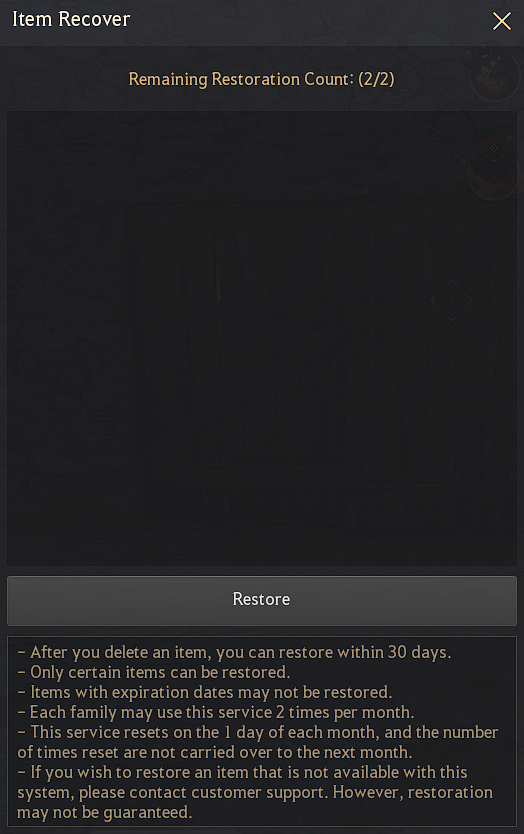
This function will allow you to restore certain valuable items within set parameters. The deleted item can only be restored within 30 days of its deletion. The service can be used 2 times per month per family, it resets on day 1 of every month, and the number of restorations to use does not carry over from one month to the next.
In the case that the item you wish to restore is not identified by this function as being valuable enough, please contact customer support.
Find My Item
The Find My Item function is convenient to check the equipped gear, silver, and items across all your character & mount inventories, town storages, Black Spirit's safe, and Central Market warehouse.
This function can be found by going to the main menu (hotkey: Esc) → Function (F8) → Find My Item, through the search function in a town's storage, or by simply pressing the hotkeys Ctrl+F.

Tip!
You can view multiple search results containing the word by appending a semicolon (;) to the end of the word. For example, entering Black;Cron will display search results containing the words Black and Cron. To achieve the intended search results, enter the search term immediately after the semicolon (;) without any spaces.
You can view multiple search results containing the word by appending a semicolon (;) to the end of the word. For example, entering Black;Cron will display search results containing the words Black and Cron. To achieve the intended search results, enter the search term immediately after the semicolon (;) without any spaces.
You can also directly retrieve items from the Find My Item window to your character's inventory when using a maid or butler. The retrieval of items stored in the Black Spirit's safe does not require a maid. However, equipped items cannot be retrieved.
➤ You can read more about maids and butlers in the [Maids & Butlers] page.
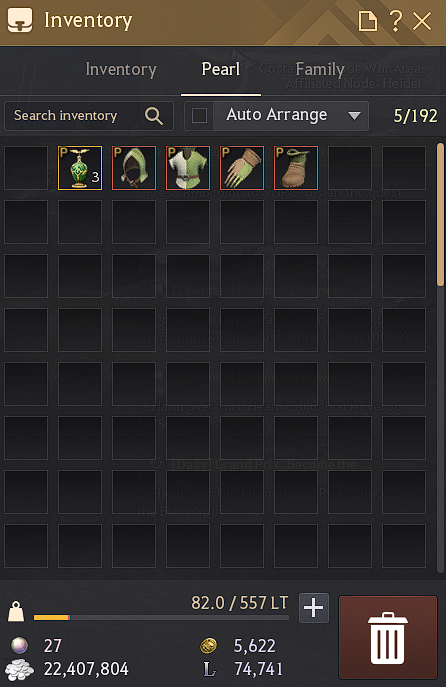
Pearl Inventory
Items purchased at the Pearl Shop are generally categorized as pearl items and thus are stored in the pearl inventory. Pearl items might also be obtained via other means, such as events, quests, and gifts.You can use all 192 slots of the pearl inventory from the time that a character is created, without additional expansion needed. Pearl items have no weight, so you do not have to worry about that.
When you want to discard an item stored in a character's pearl inventory, just like you do with the normal inventory, drag the item to the trash can icon at the bottom right of the window, or drag the item out of the inventory.
In comparison to the normal inventory, the Throw Item Away trash can icon will not allow you to select various pearl items at the same time to delete them, and clicking it will instead open the Item Recover window to restore your deleted pearl items. It is the same system as with the normal inventory, and thus the same rules apply.
Tip!
Have you exceeded the 192-slot limit in your Pearl Inventory?
You can purchase Patrigio's Extra-Large Apparel Bag in the Loyalty Shop, which can store up to 40 outfit pieces, helping you free up space.
Have you exceeded the 192-slot limit in your Pearl Inventory?
You can purchase Patrigio's Extra-Large Apparel Bag in the Loyalty Shop, which can store up to 40 outfit pieces, helping you free up space.
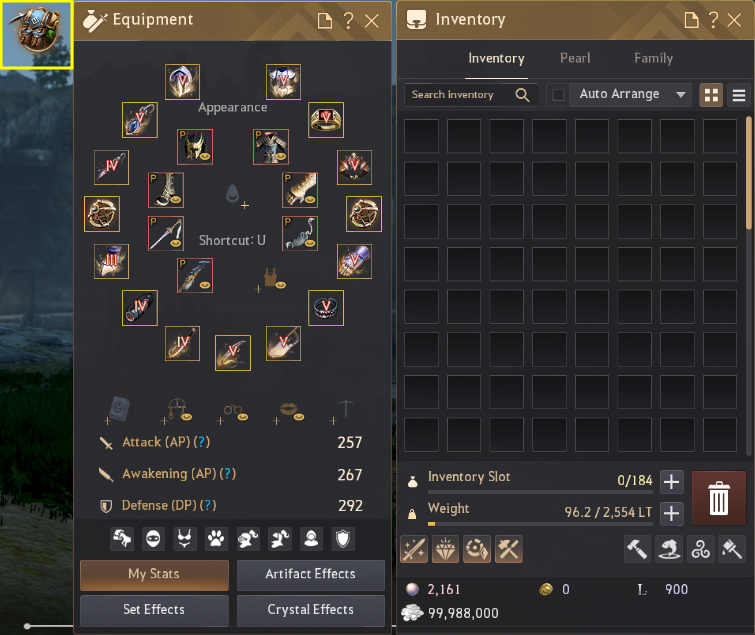
Inventory Interface
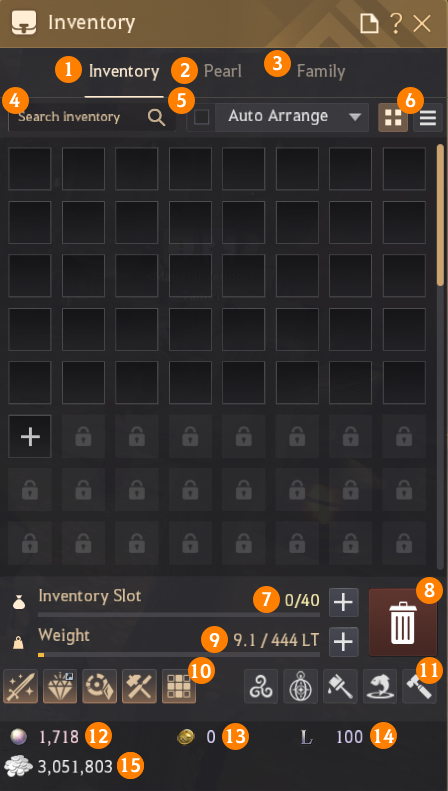
1. Inventory Tab: Inventory window for normal game items.
2. Pearl Inventory Tab: Inventory window for pearl items.
3. Family Inventory Tab: Inventory window for the family inventory.
You can read more about this feature in the [Family Inventory] page.
4. Inventory Search Bar: Type the name of the item you are searching for, and it will be highlighted.
5. Auto Arrange Function: Tick it to arrange items automatically by type.
6. Category Sorting: Sort the items by slots or categories.
7. Inventory Slots: A visual bar and numerical value that shows how full your inventory is.
8. Throw Item Away Button: The trash can into which you can drag and discard items. As said previously, be careful when you discard an item, as while the item recovery function will help you a couple of times per month, and the customer support service can assist you further, it may be possible for an item to be unrecoverable.
9. Weight: Shows both numerically and visually the weight your character is carrying. Hover the cursor above the weight icon to the left to see the detailed weight of both inventory items and equipped items.
10. Enhancement, Transfusion, Artifact Inventory, and Yaz's Pouch: These buttons open, from left to right, the Enhancement window, the Transfusion window, and the Artifacts window.
– Equipment enhancement in Black Desert is carried out via the consumption of enhancement materials by the Black Spirit, so it can improve your equipment pieces.
– Magic crystals can aid you in your adventures by increasing your stats.
– In the Artifacts window, you can store your artifacts and lightstones, as well as infuse the latter into the former and create presets for their use.– Item parts can be combined in the Yaz's Pouch
➤ You can read more about these features in the [Enhancement], [Magic Crystals], [Artifacts & Lightstones], and [Gathering] pages.
11. Alchemy Stone, Dehkia's Lantern, Dye Palette, Totem of the Sea, and Production: These buttons open, from left to right, the Alchemy Stone window, the Recharge Dehkia's Lantern window, the Dye Palette window, the Totem of the Sea window, and the Processing window.
– The Alchemy Stone window is where you recharge, polish, and perform growth on your alchemy stones. Recharging them allows for their continued use. Polishing them gives them experience points. Attempting growth on a stone can improve it to a better grade and quality.
– Dehkia's Lantern allows one, in certain monster zones, to alter nearby affected monsters and awaken them into a state of chaos, increasing their strength and making them repeatedly reappear after defeating them, with no waiting time.
– The Dye button opens the Dye Palette window, in which you can add obtained dyes to your palette for future application.
– The totem of the sea serves to boost your ship's statistics, such as its speed.
– The Processing button opens the processing life skill window (hotkey: L).
➤ You can read more about these features in the [Alchemy Stone], [Dehkias Lantern], [Dye], and [Processing] pages.
12. Pearls: Shows you the amount of pearls your family has.
13. Crow Coins: Shows you the amount of crow coins your family possesses. This is a special currency employed on a certain island shrouded in mist.
➤ You can read more about this currency in the [Great Expedition] page.
14. Loyalties: Shows you the amount of Loyalties your family has. It is a currency obtainable on a daily basis via the Challenge reward tab of your profile, and it is used to purchase products from the Loyalties tab in the Pearl Shop.
15. Silver: Shows you the universal currency, money, you currently have. They are used for NPC shops and services everywhere, and the Central Market. You can also store them in the Central Market warehouse.
* The content of the game guide may differ from the actual game content, depending on the update and content changes.